
navigating to the product
Firstly, navigate to 'Product Information' where all your products will be located.

And select the product in which you wish to add your design/details to.
If you’re yet to add a product, head over to ‘adding a product’ to learn how to add your product.
adding design sheets
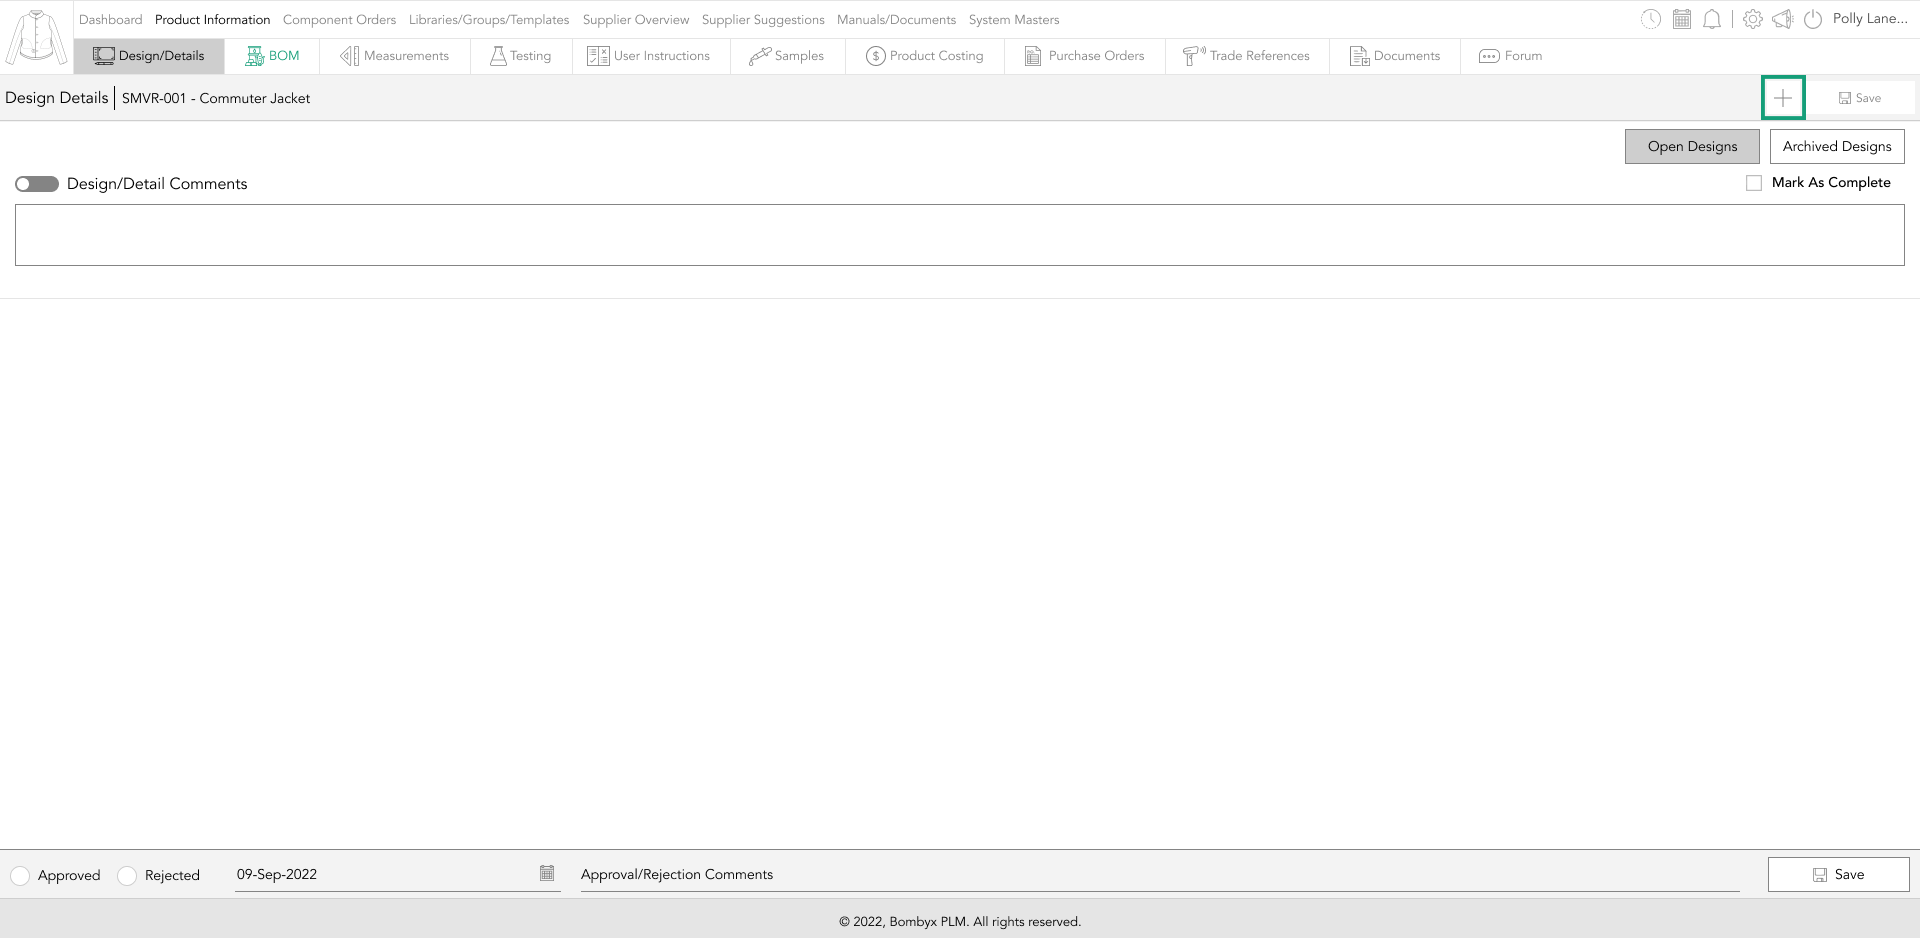
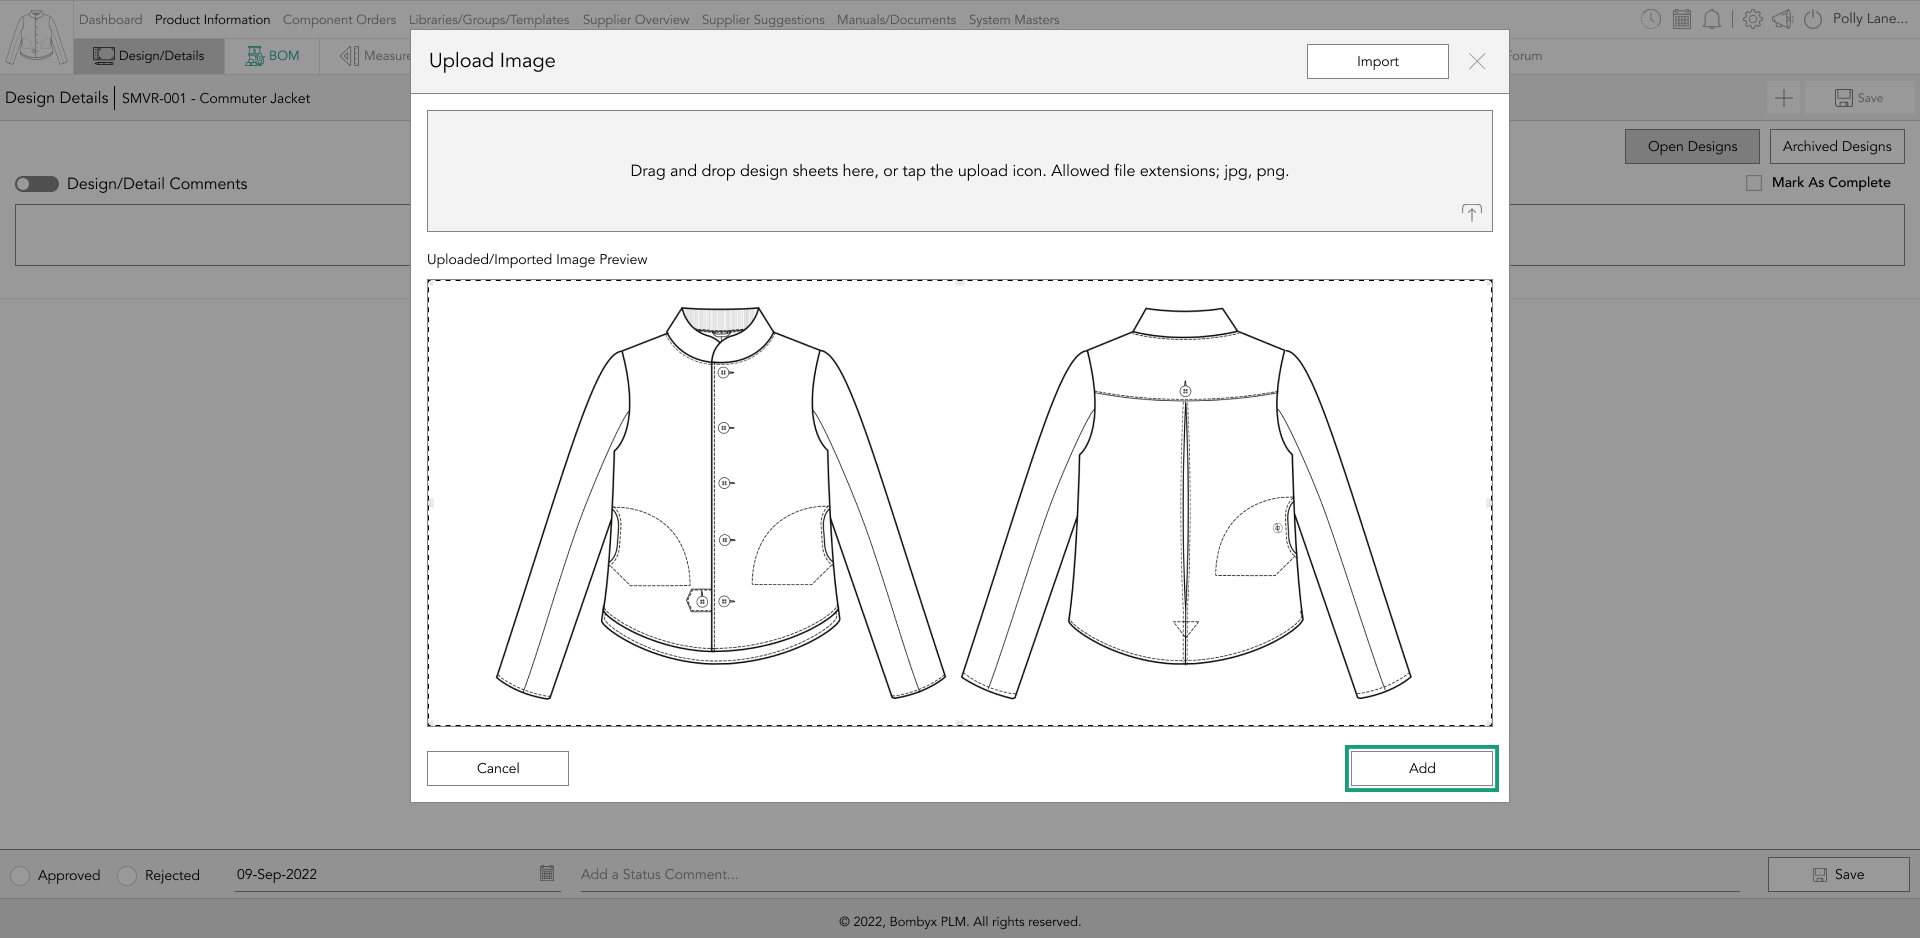
In the design/details module, tap the plus icon.
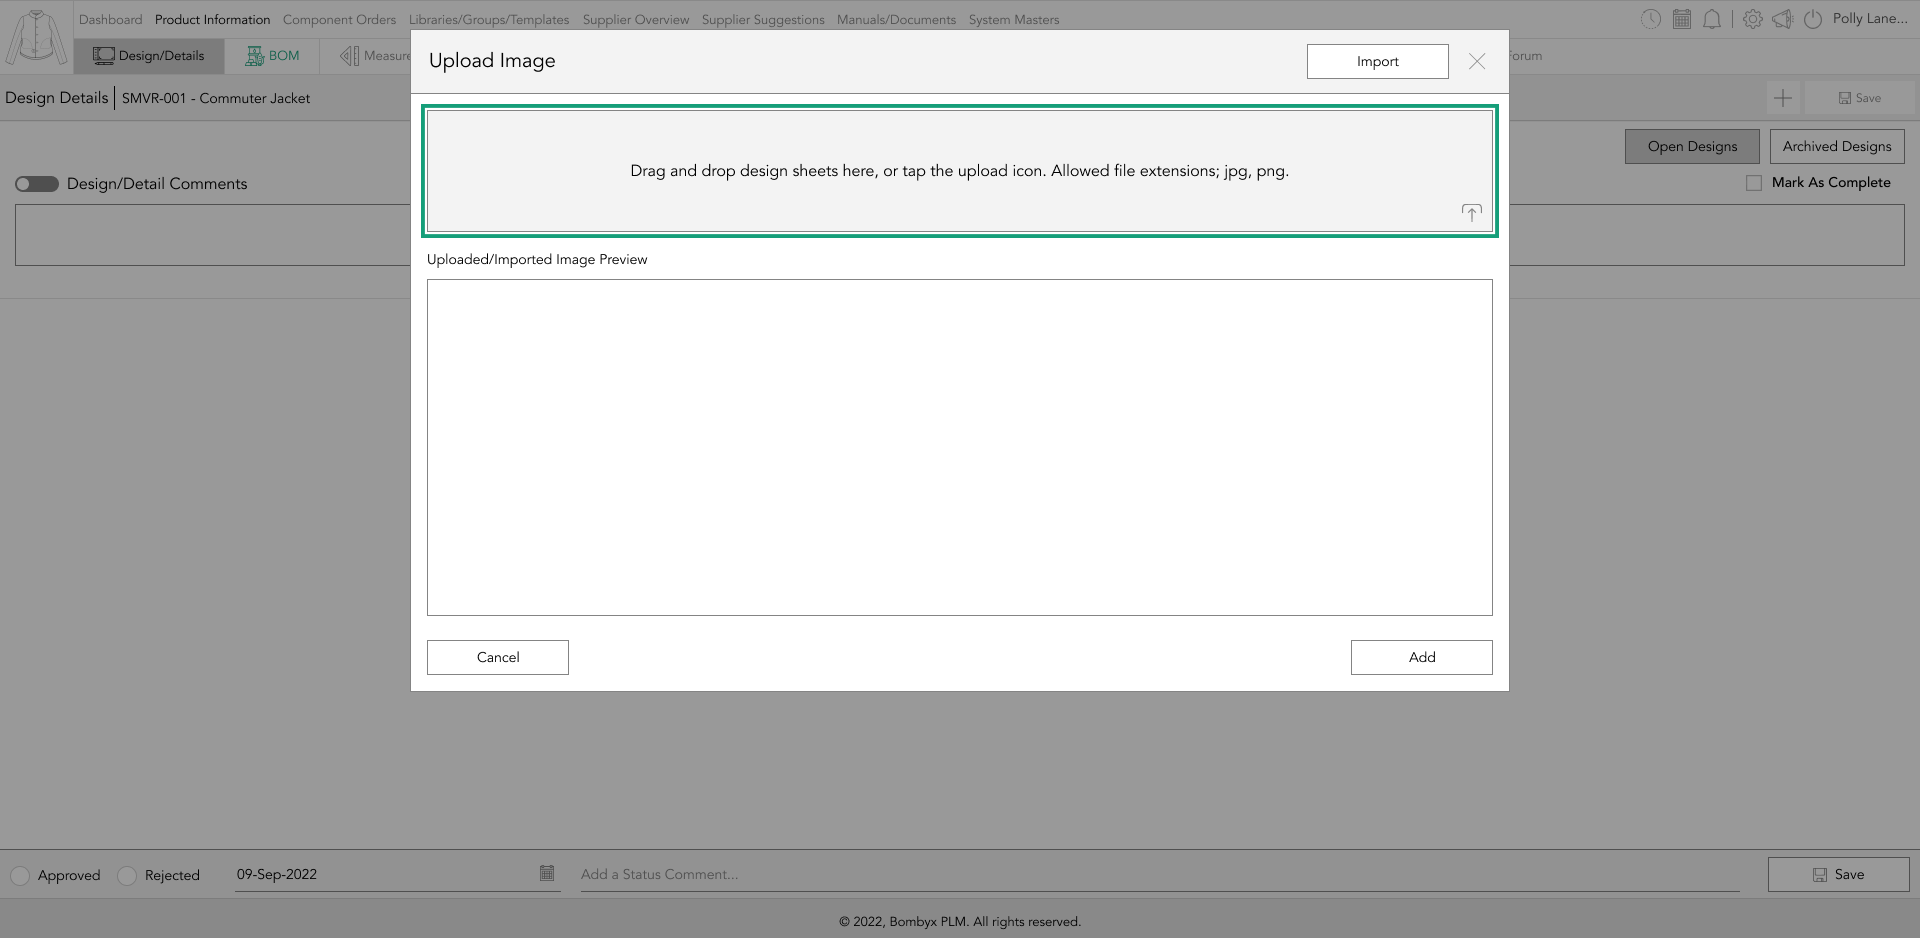
A popup will appear where you can do one of two things; drag your imagery into the upload space...
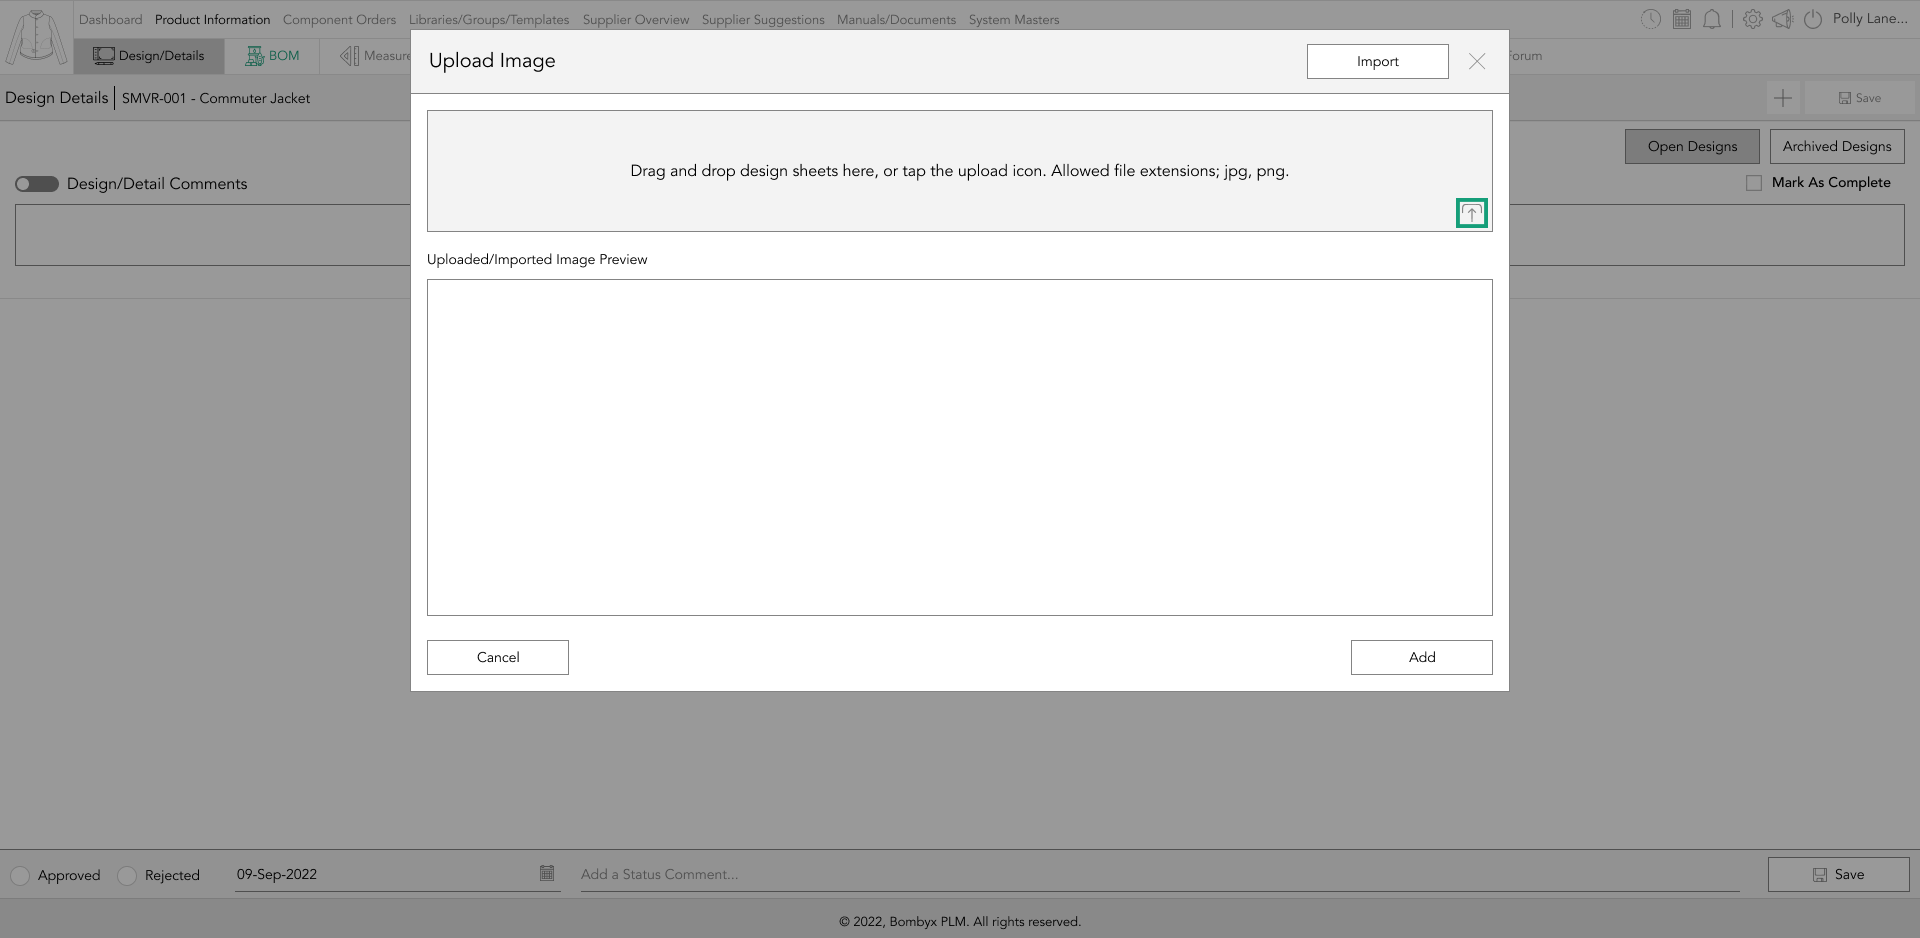
or alternatively, tap the upload icon in the bottom, right-hand side of the upload space and select the files you wish to upload from your device.
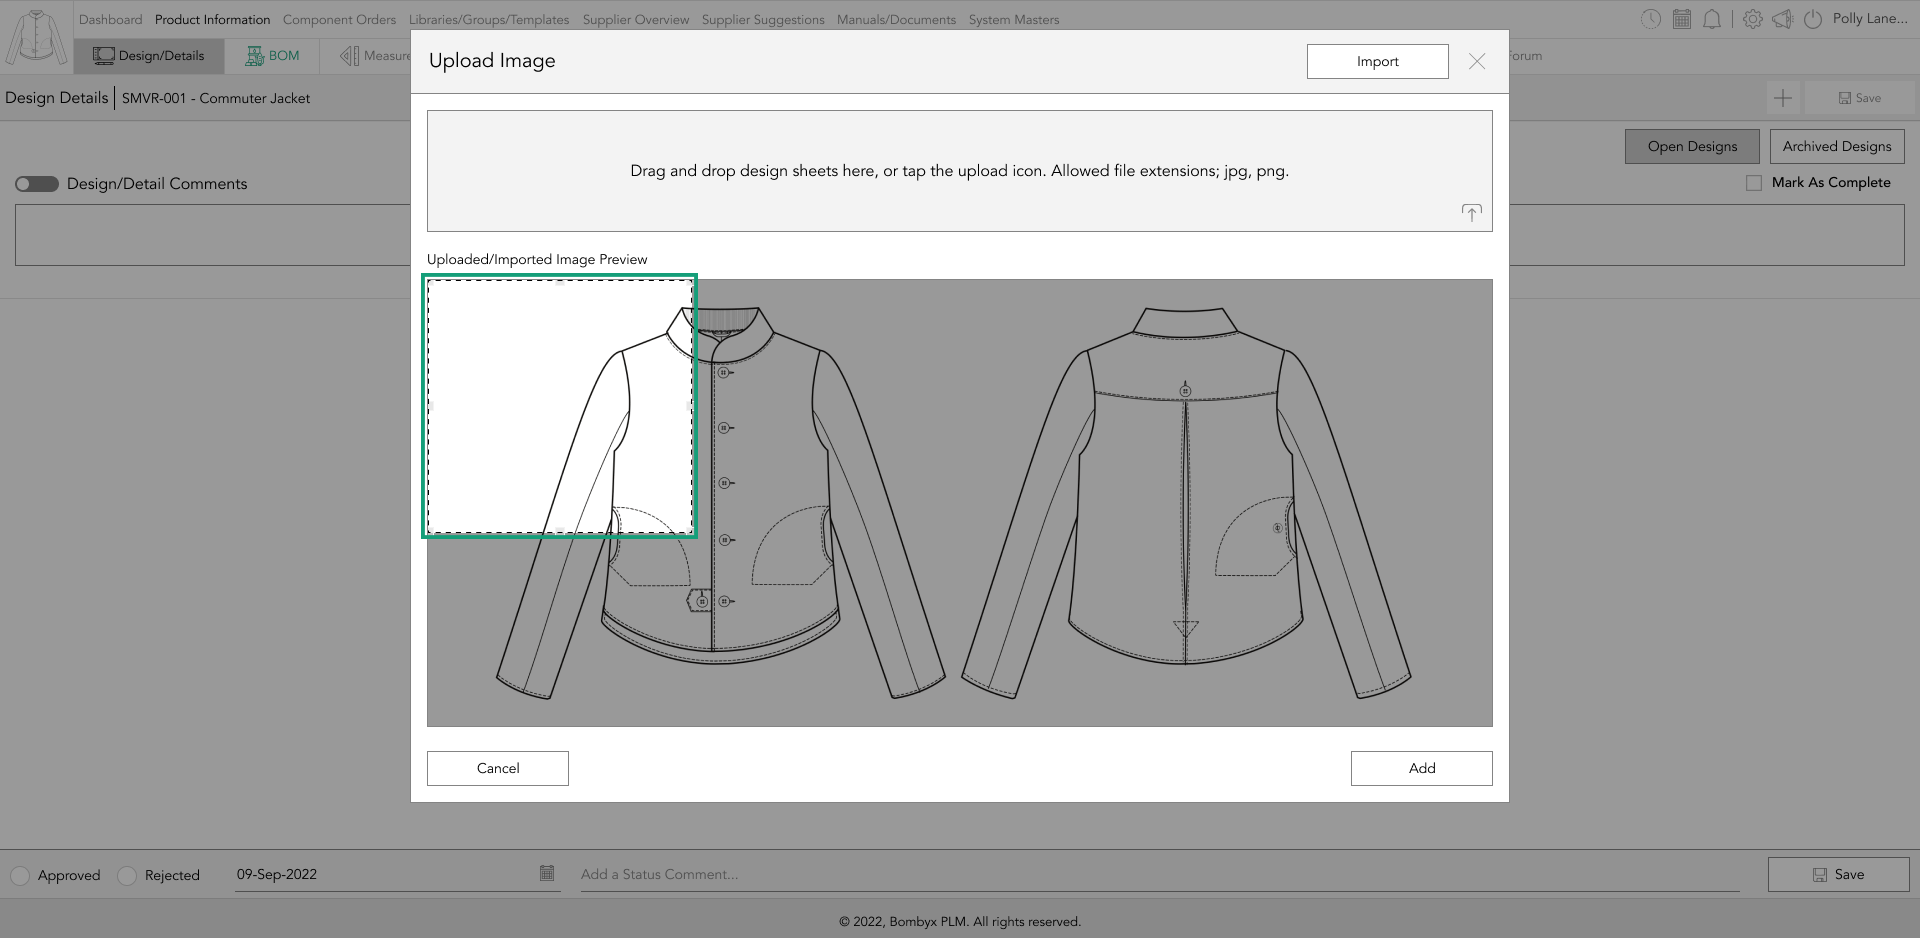
Once selected, tap the ‘Add’ button, and the designs will be added to the design/details space.
importing design sheets/references
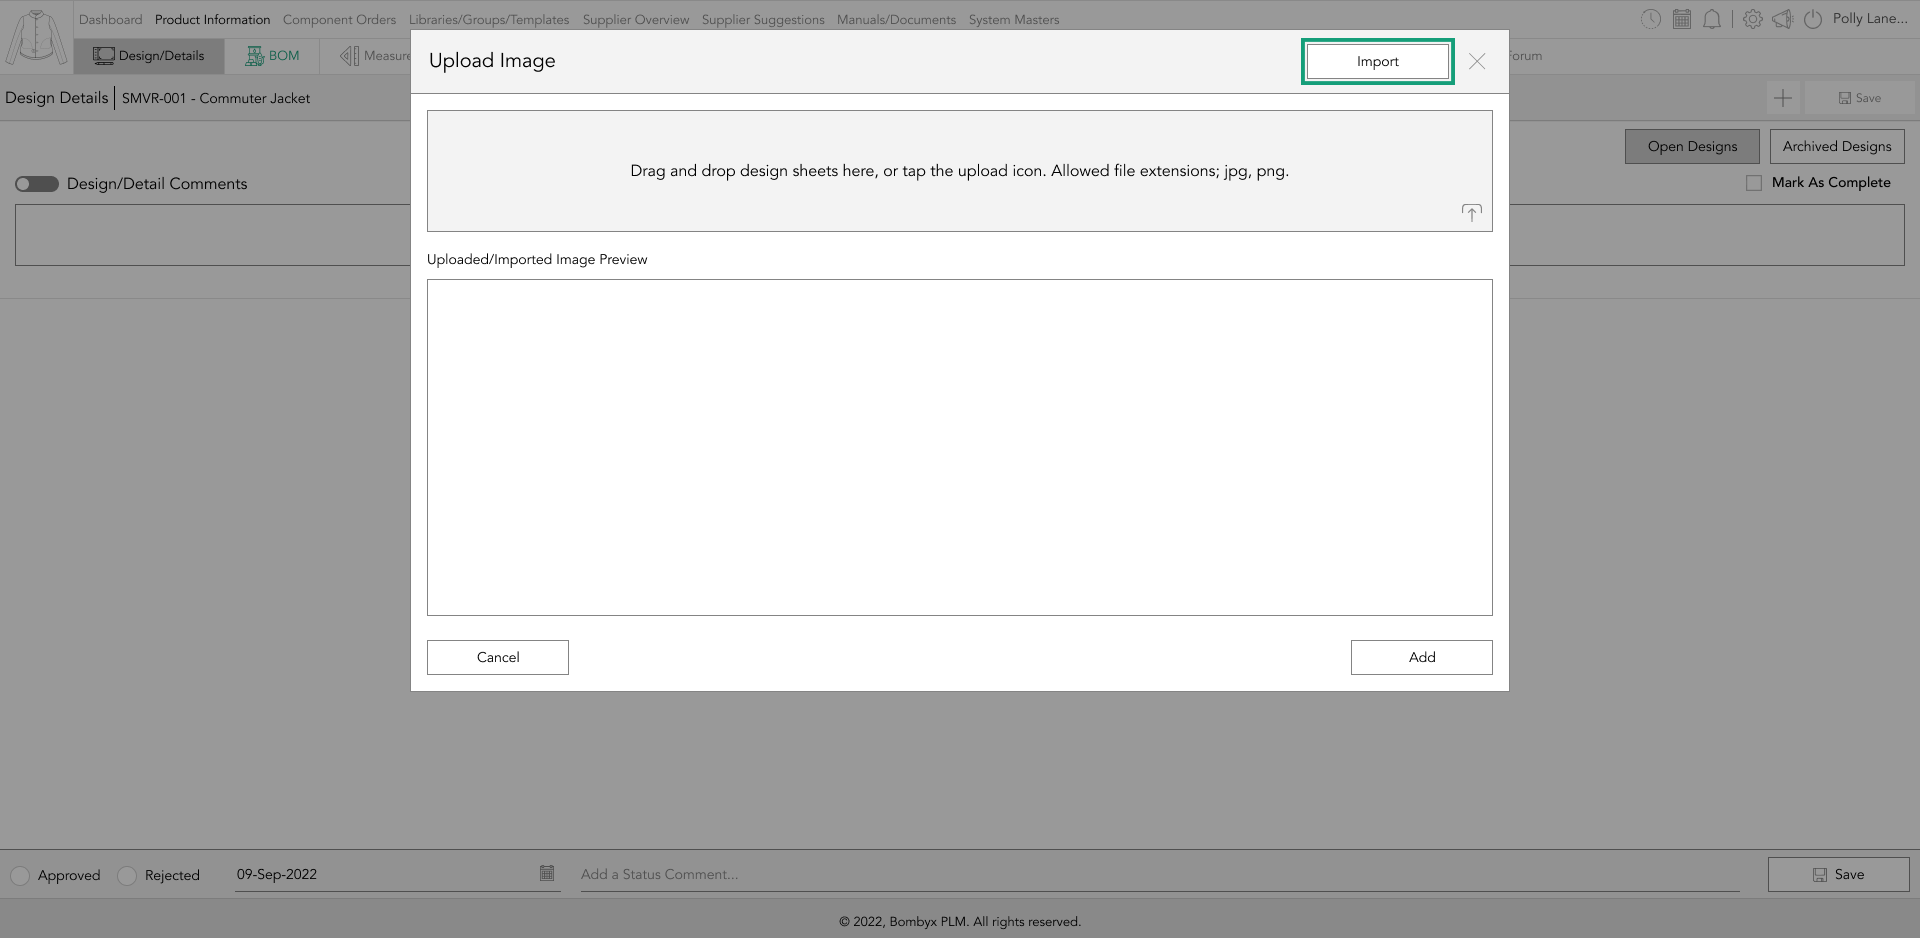
If, for whatever reason you’ve stored design imagery or reference material in manuals/documents on Bombyx, you can import these into the design area.
Tap ‘Import’ and locate the design/reference sheet you’d like to select and reuse this here.
adding a title for your design upload
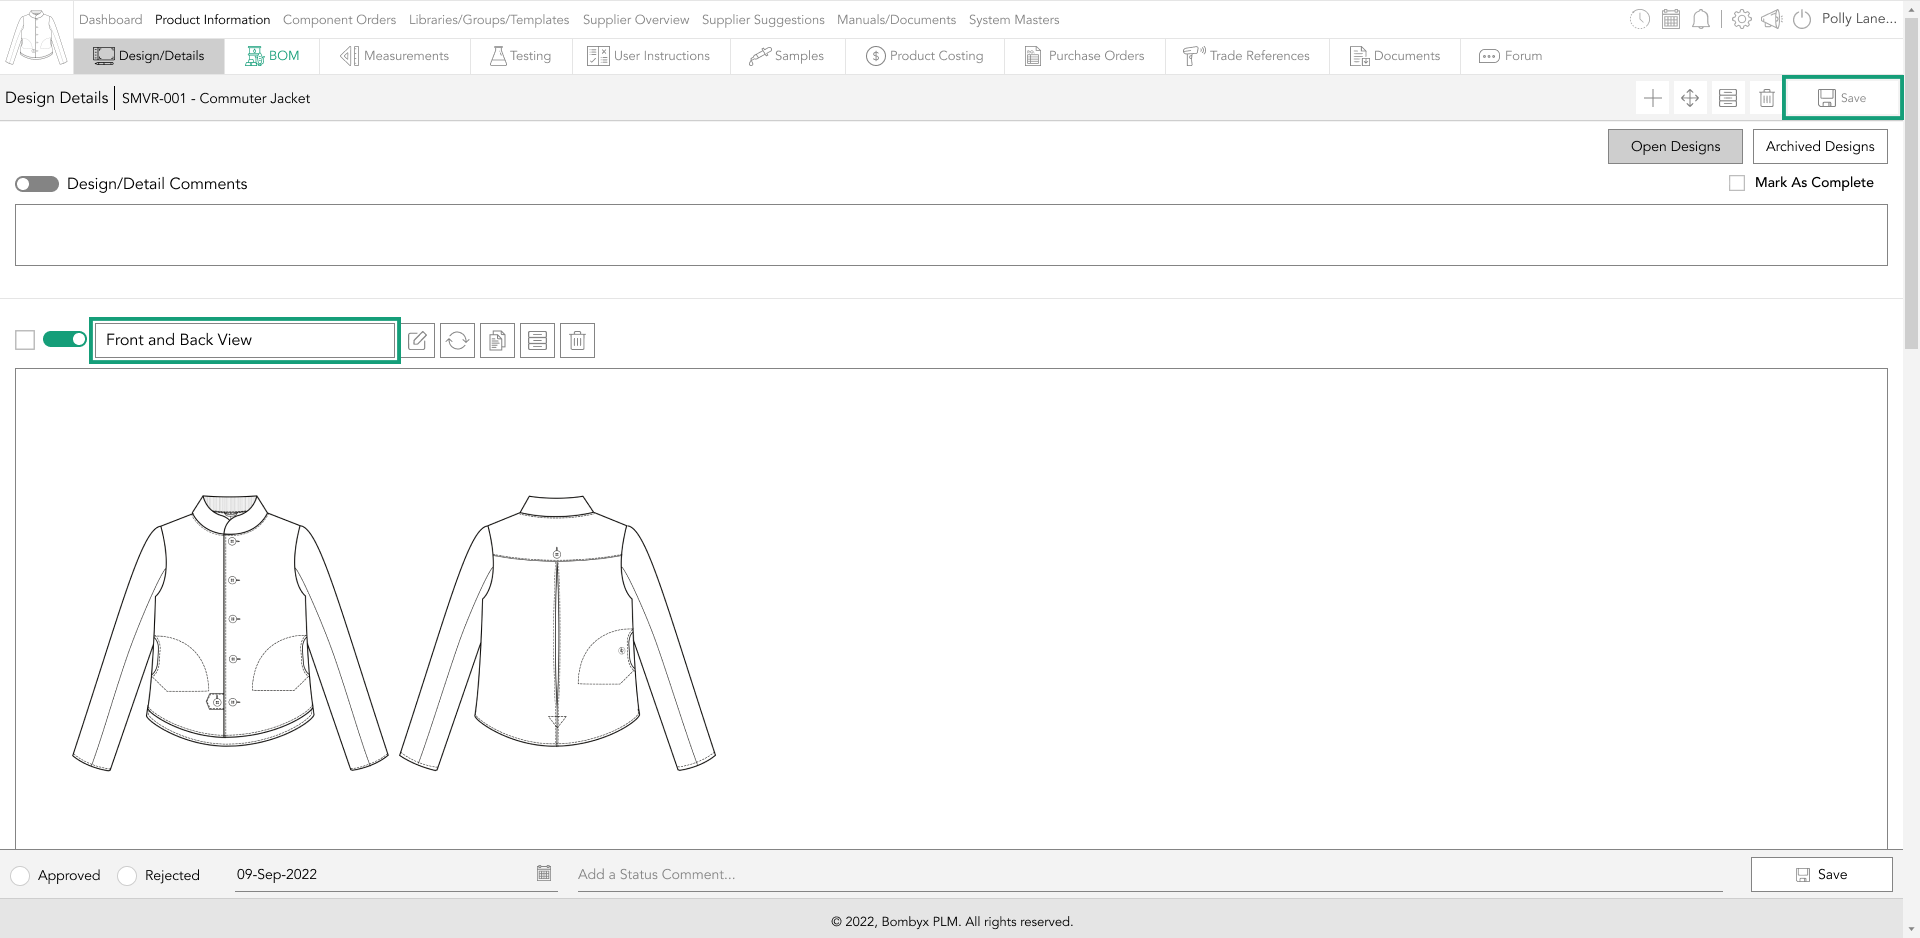
Adding a title is as simple as entering the title in the text box above the image and tapping save.
toggles
Toggles are tablets that serve a function that allows you to hide work from a supplier or external stakeholder whilst you get to work on completing it.
If you turn the toggle on by tapping it, you’ll be able to showcase the upload on the Bombyx platform as well as in the PDF file which you’re able to submit to collaborators.

applying general comments
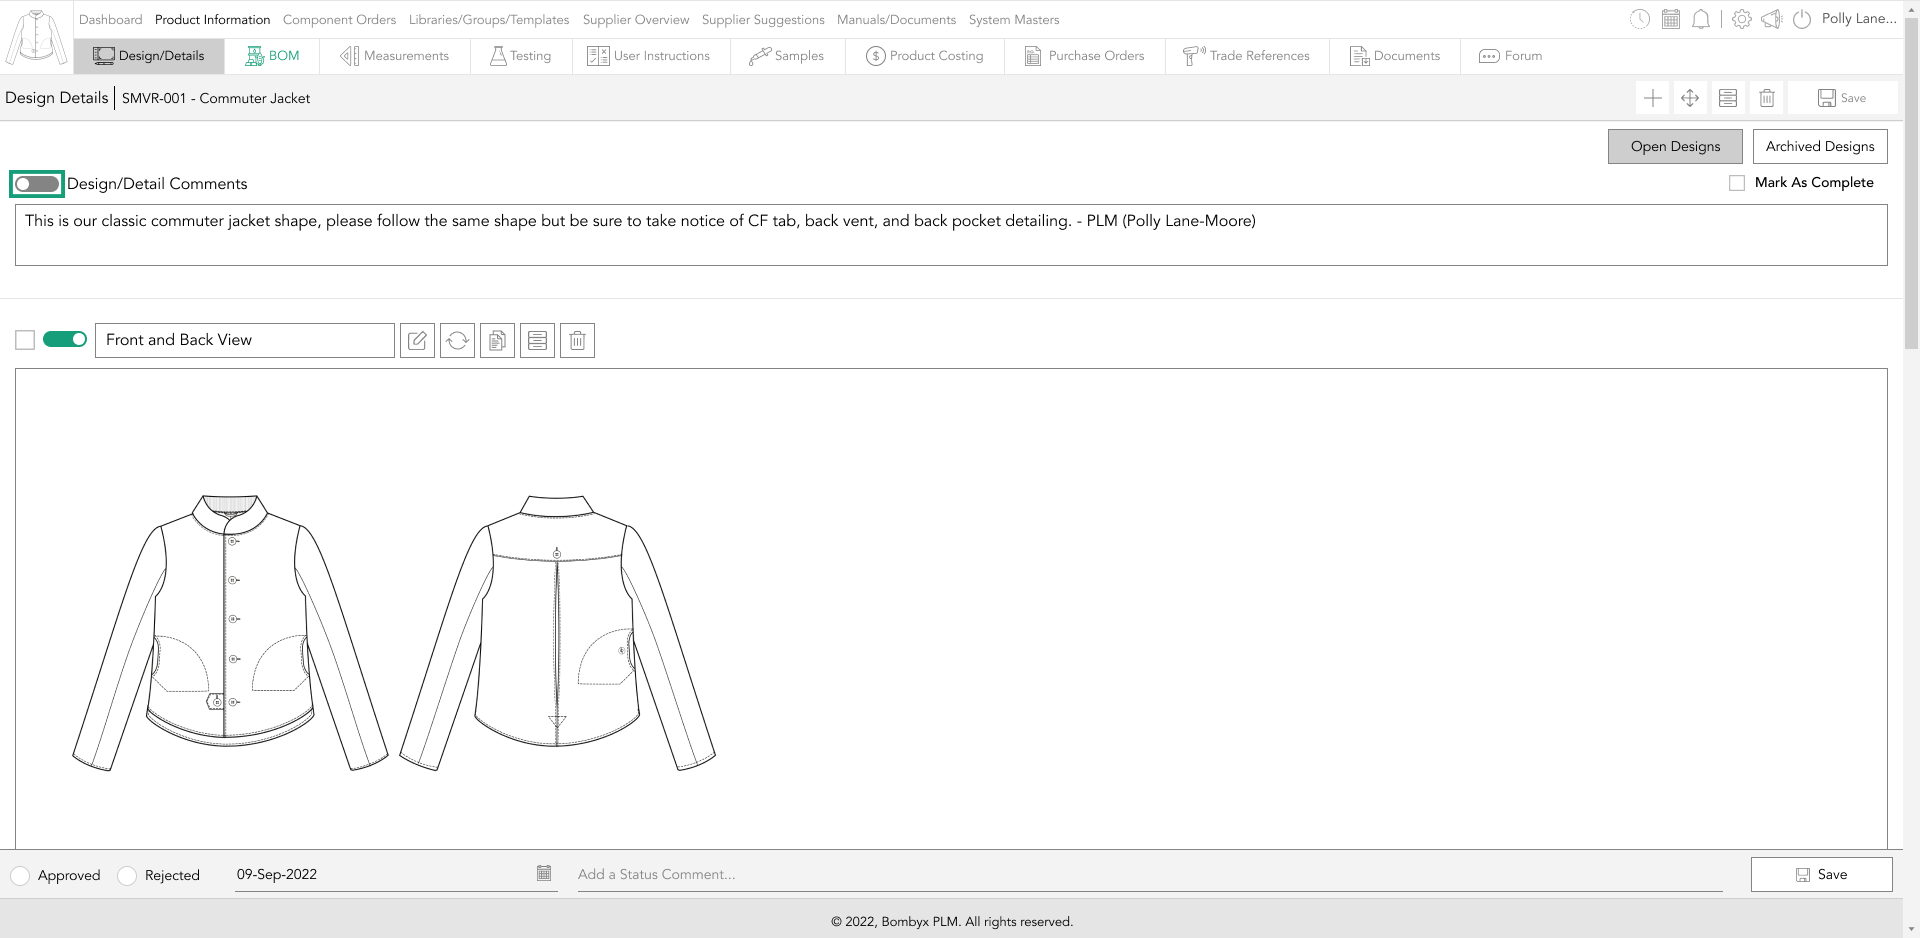
At the top of the page is a space for general comments you wish to share with your collaborators, whether that be your internal team or supply chain.
All you have to do to make it visible outside of your organisation is to turn the toggle on (green), and your suppliers will also be able to see those comments.
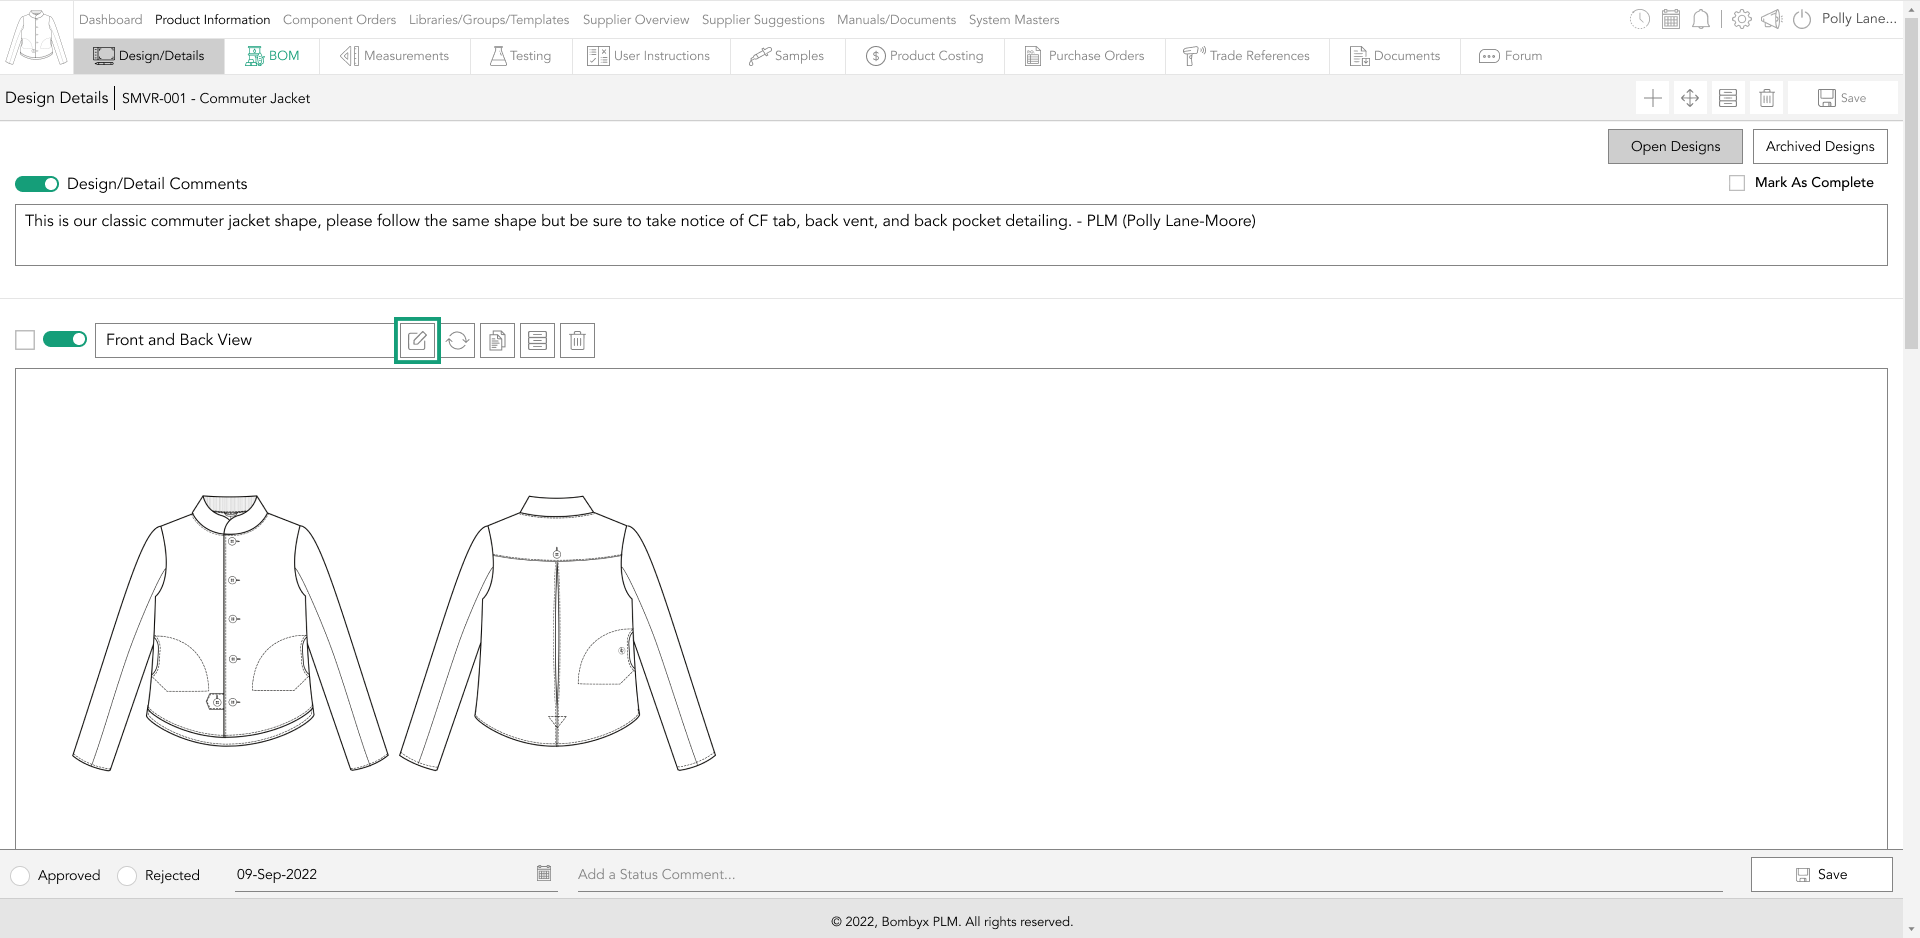
annotating designs
Tap the annotate icon and from there, you’ll be offered an array of tools to draw up how you’d like to communicate your information.
From lines, arrows, and textboxes, to shapes, colours, and other formatting options.
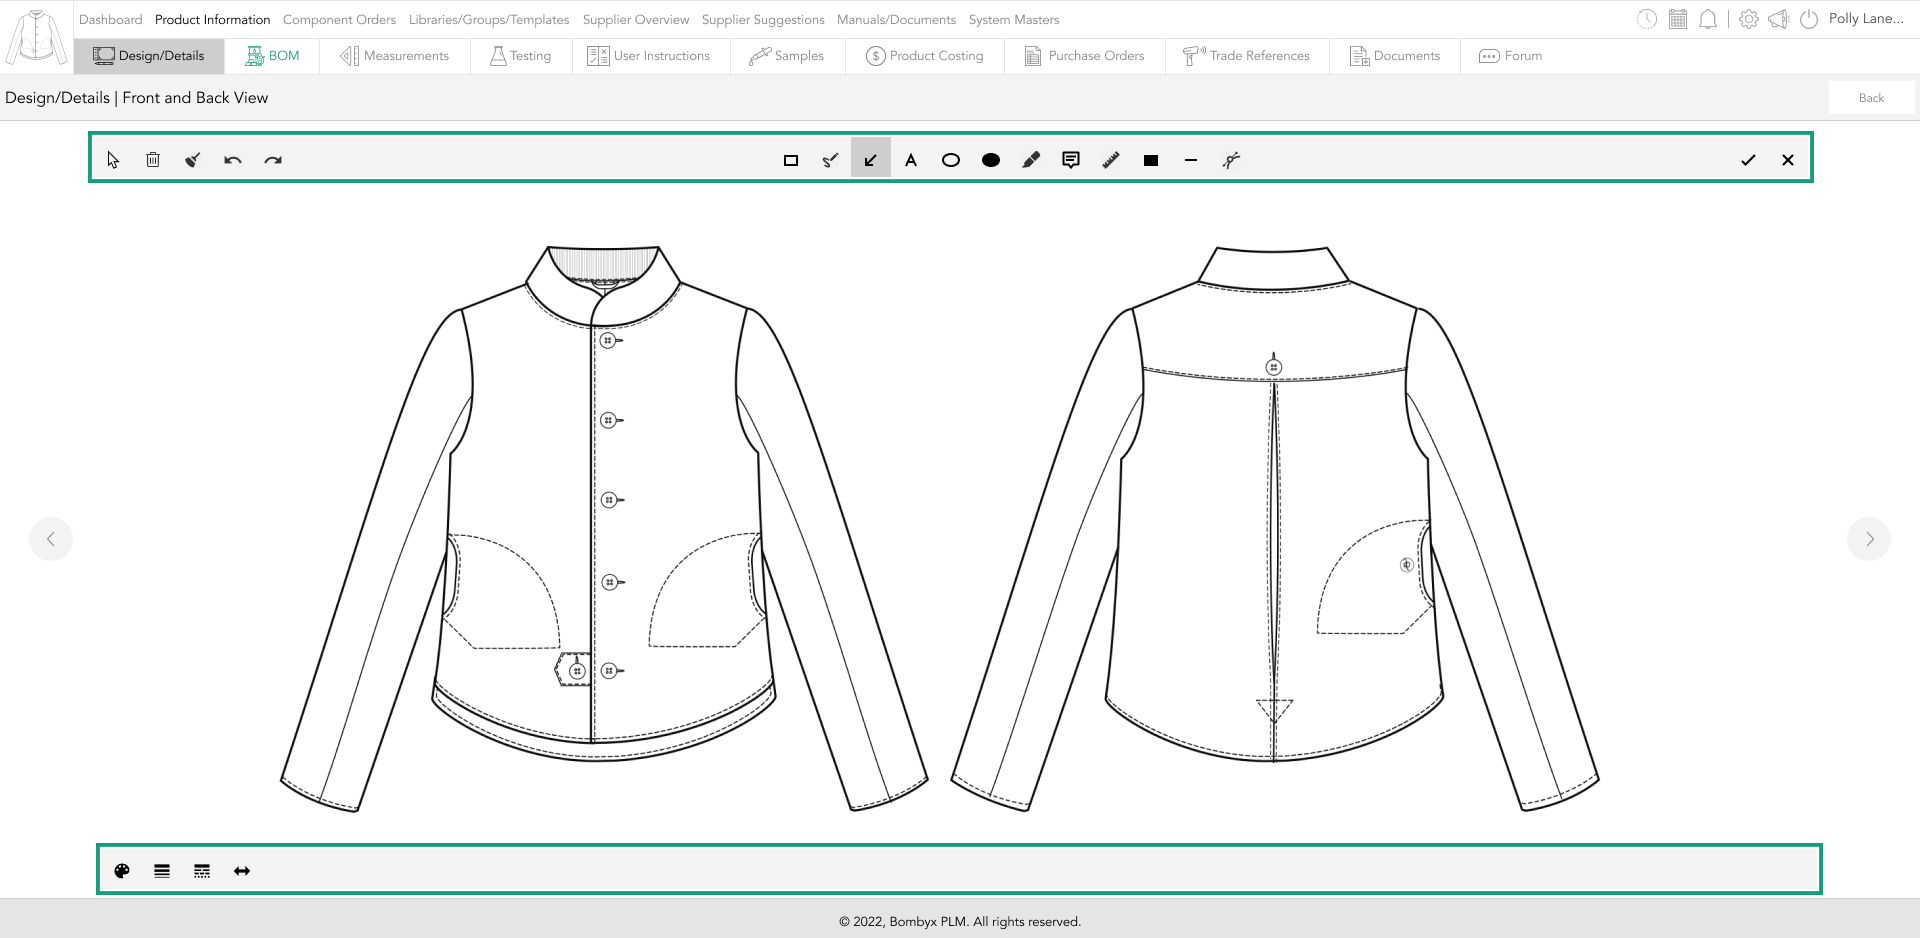
The tools will appear in the centre of the toolbar, and on the right-hand side are the formatting options for the selected tool.
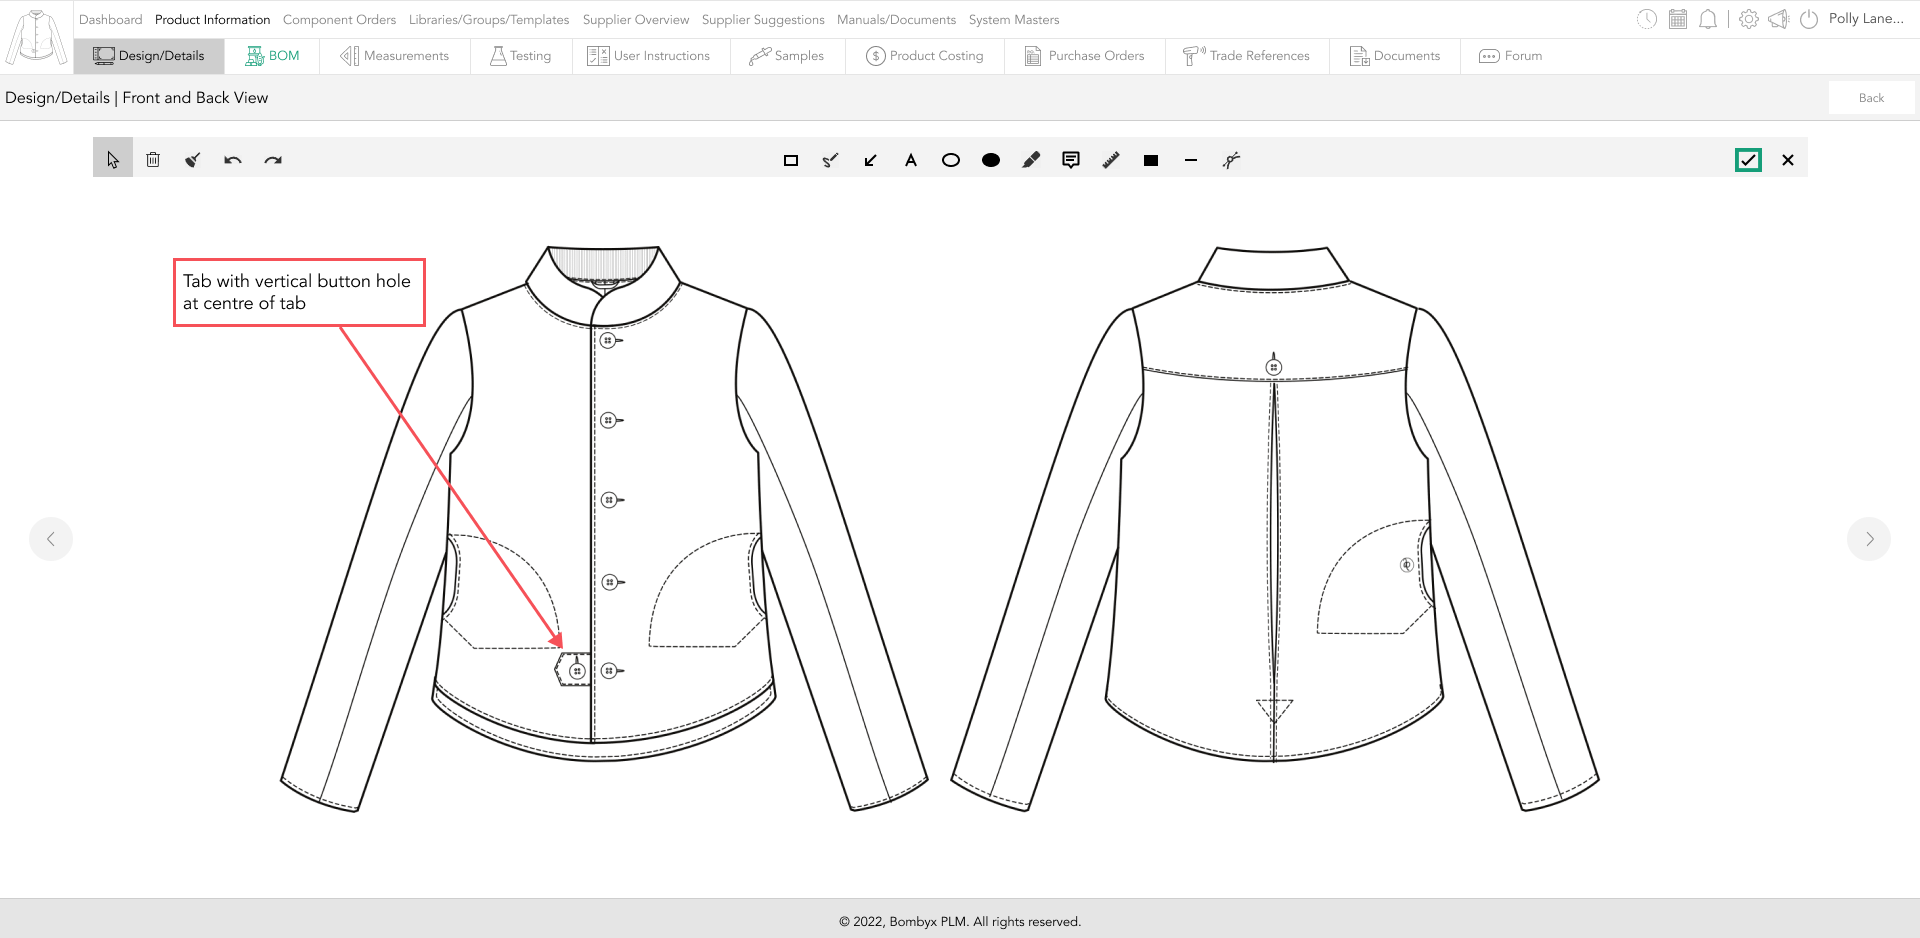
rearranging designs
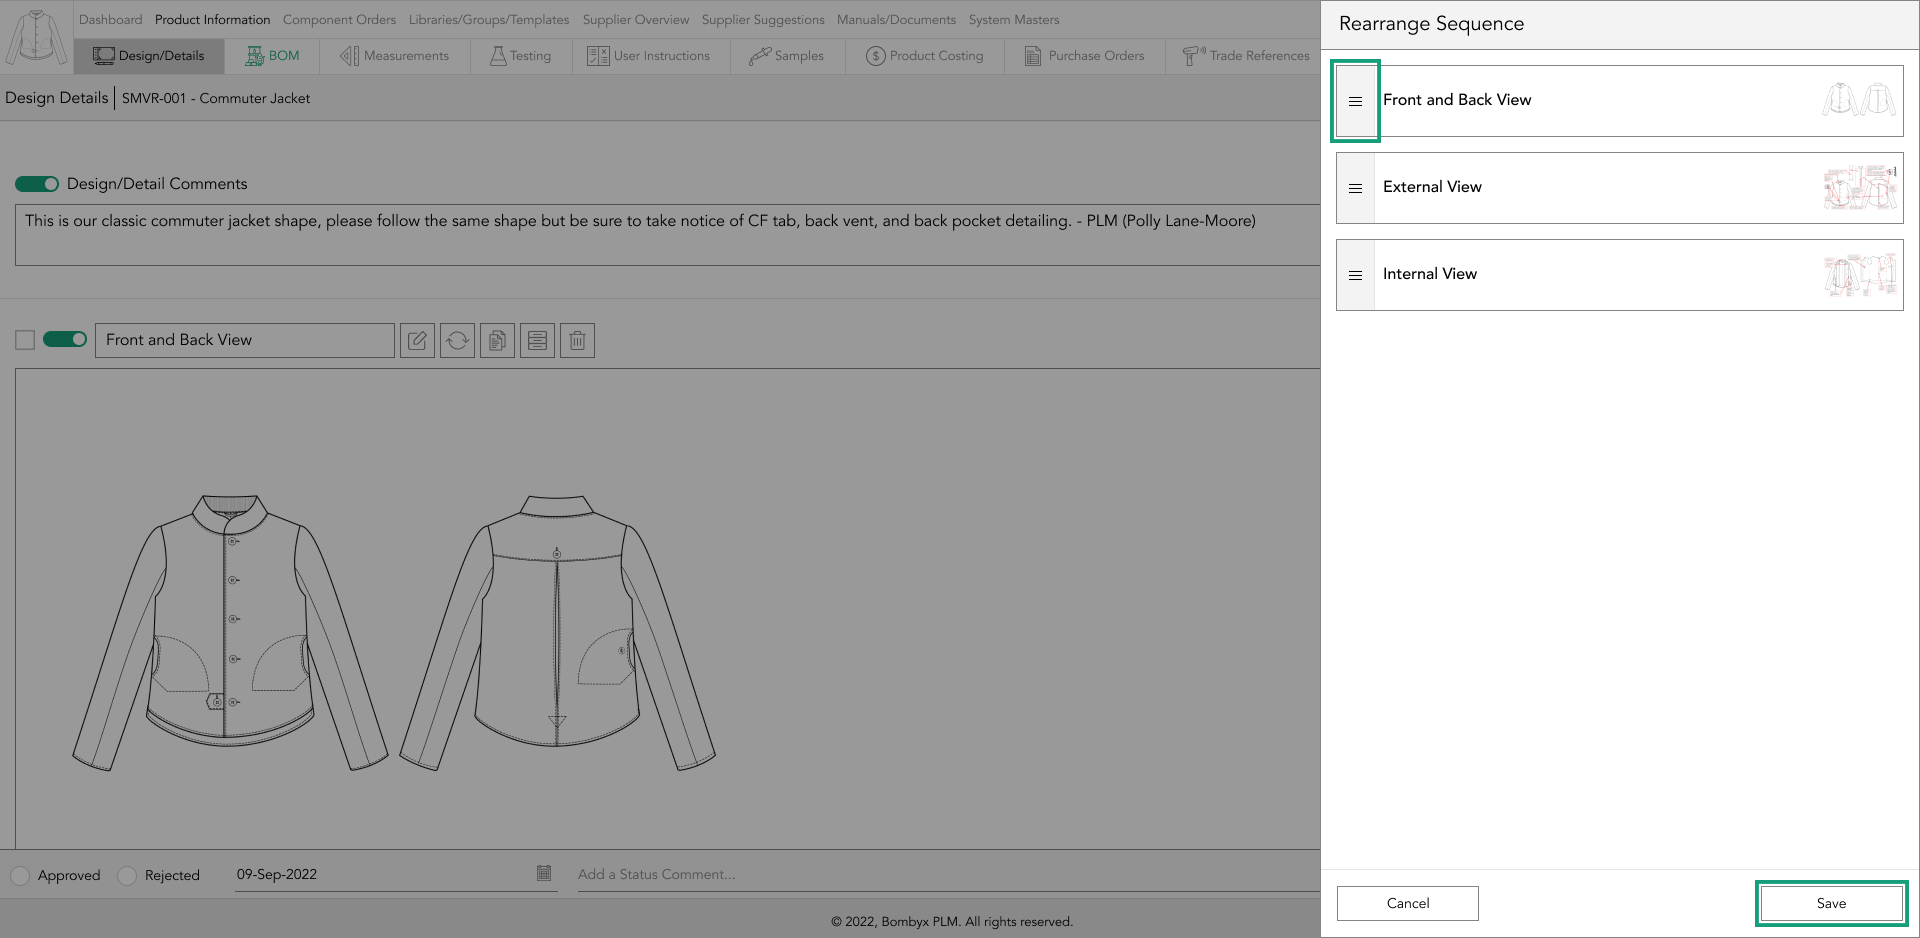
For rearranging the order of your uploads, tap the rearrange button, and on the top right-hand side.
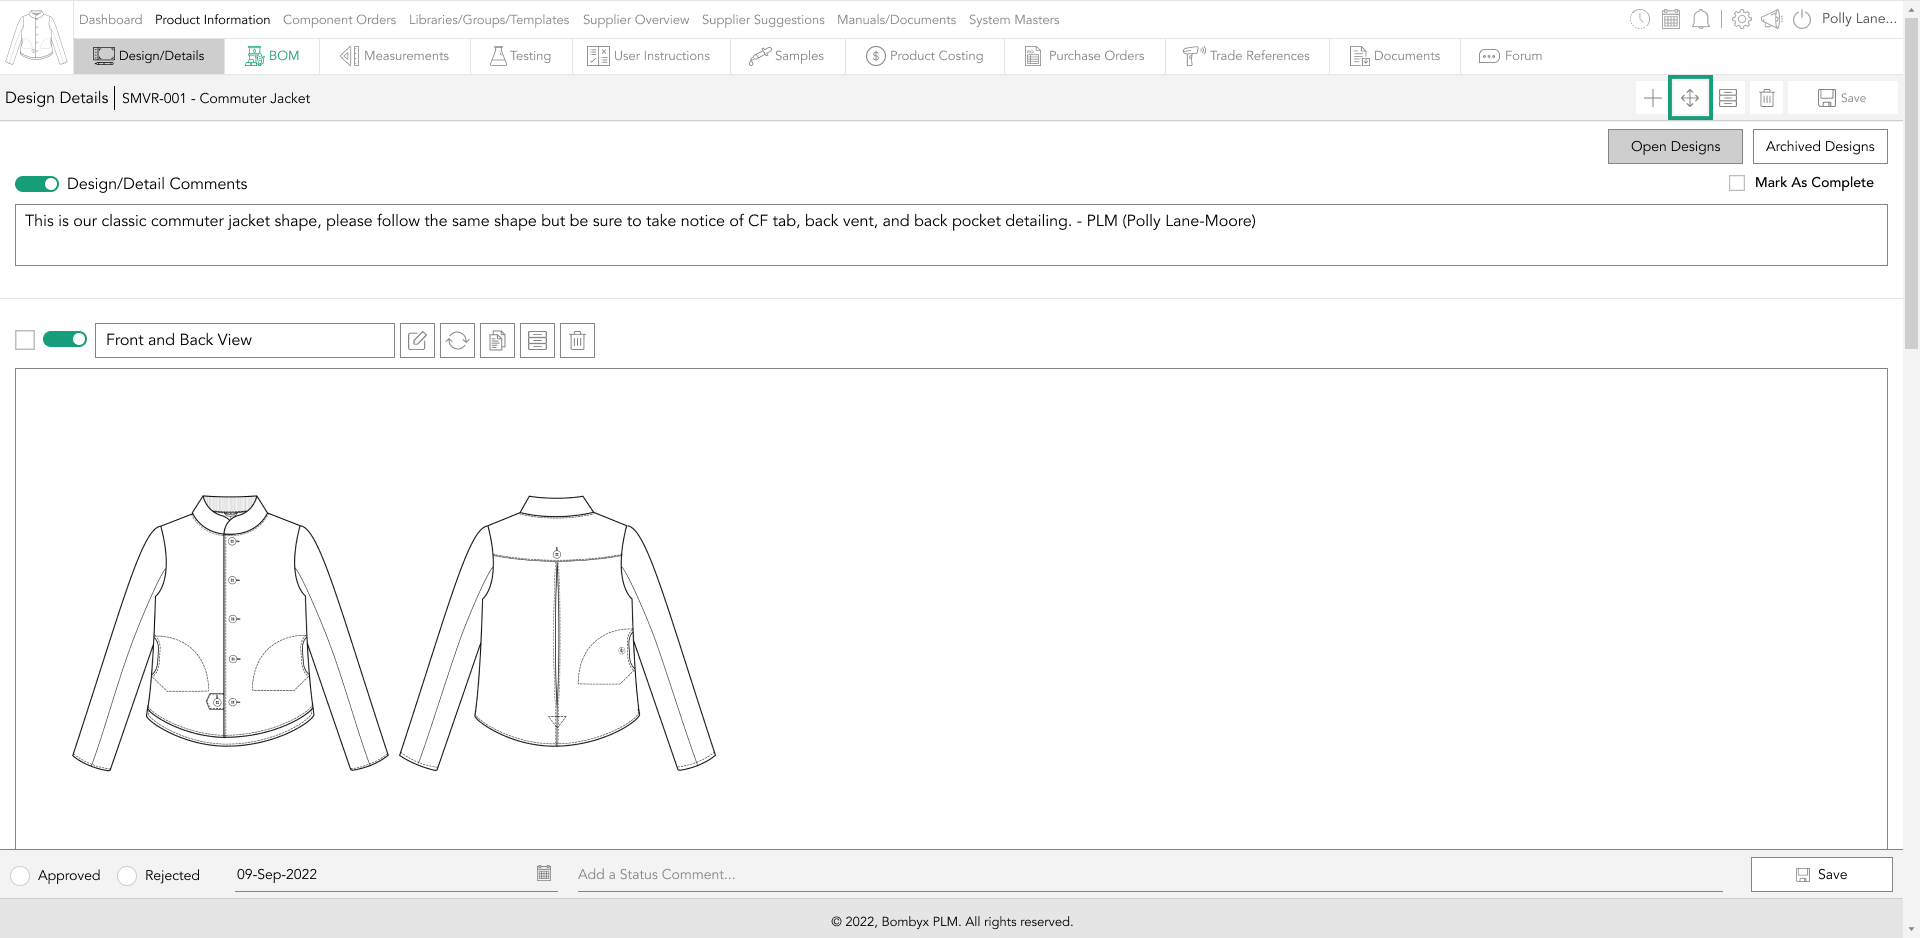
A panel will appear with a list of all the design details.Simply drag and drop the items into the order that you’d like. Once done, tap save.
update/replace an image
During the lifecycle of your product there are likely to be design/engineering changes that you need to apply to your design. For this, we’ve applied an update/replace function to keep your annotations in place and allow you to update your image without re-entering all your information.
To use the replace function, tap the replace icon to the right of the title field on the design image you're wanting to replace.

A popup will appear, similar to uploading a design from scratch, and the same process will apply.
Tip: To ensure the annotations are placed correctly, ensure the replacement image is of the same canvas size, and the position of the designs are the same as the one you’re replacing it with.
duplicate an image
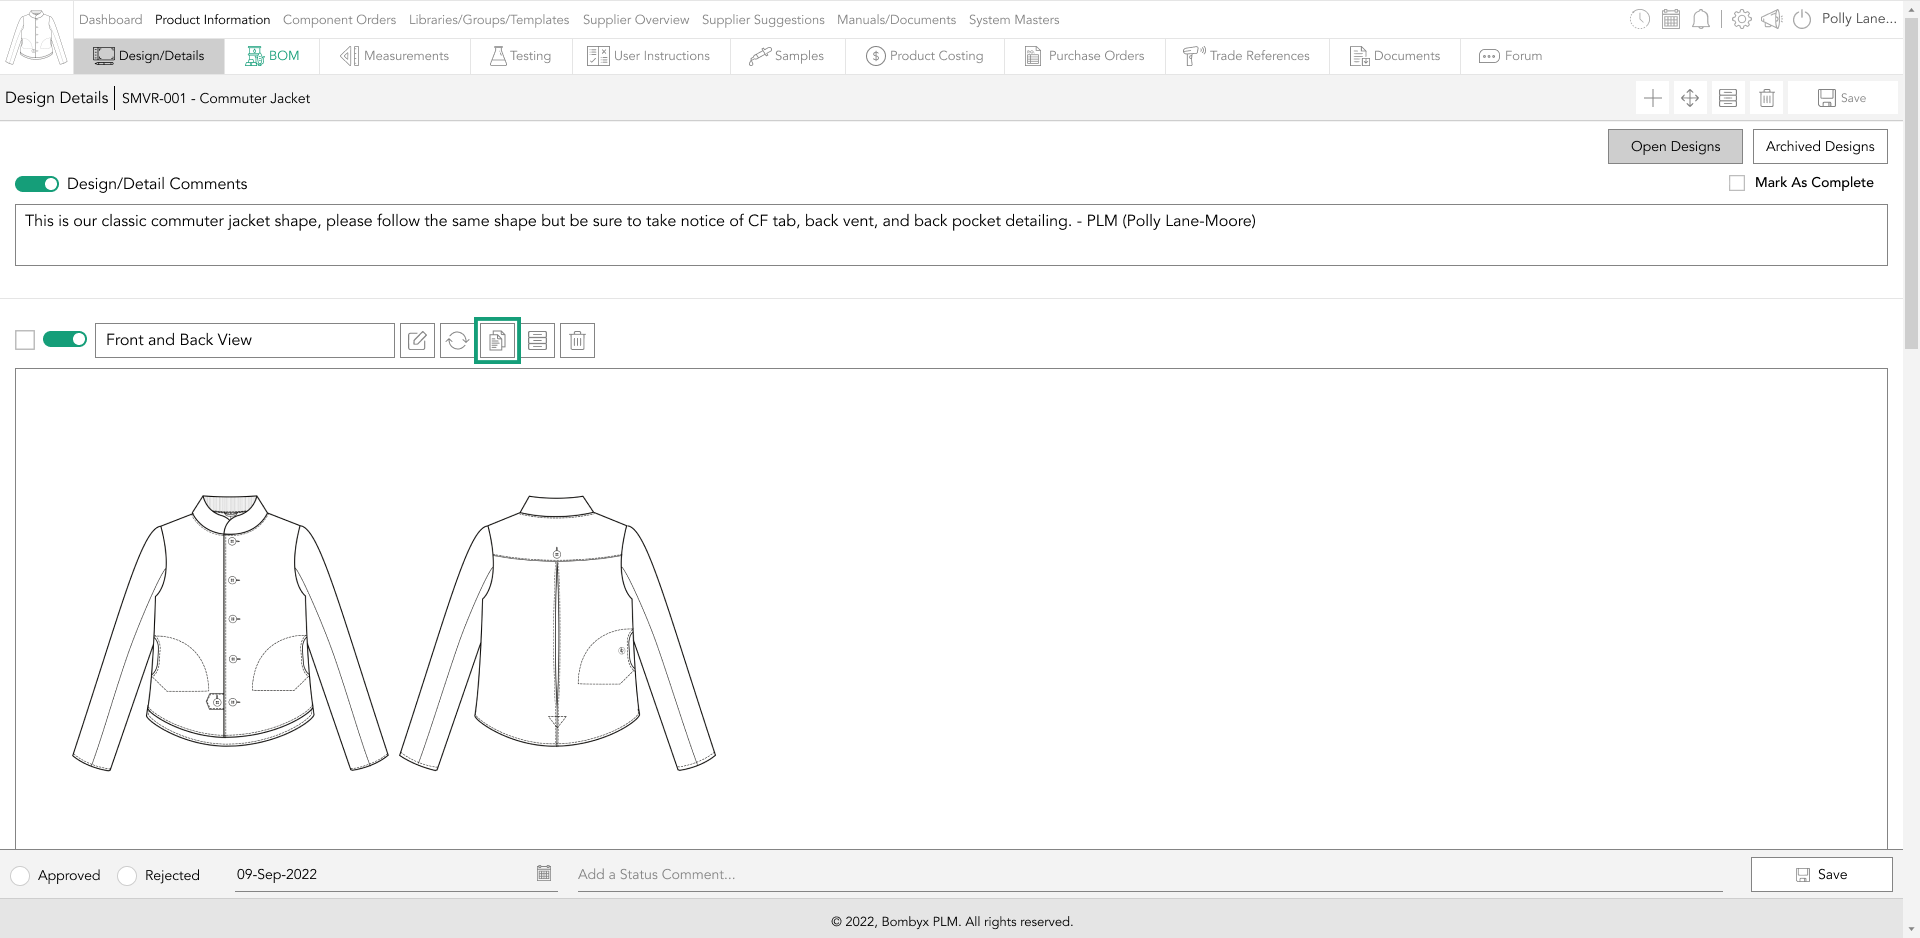
Duplicating an image is really useful when you have a lot of annotations and would like to not overcrowd an image with too much information. Your suppliers will also appreciate this!
If you annotate your image before duplication, this action will duplicate the annotations along with the image.
To duplicate an image tap the duplicate icon to the right of the title field.
Tip: You could display information on one set of annotations as to what you’d like to explain in detail, and apply some specifications on the other, keeping them separate, and making it easier for your collaborators to view the information.
archiving and unarchiving single and multiple designs
To archive a single design tap the archive icon on the right-hand side of the title field.
A popup will appear asking if you’re sure you’d like to archive the design, along with a text box, for you to leave a reason/comment for archiving.

To archive, multiple designs, check the checkboxes to the left-hand side of each design's title field.
Once you have selected the design sheets you’d like to archive, tap the archive icon on the right-hand side of the grey bar at the top of the page.
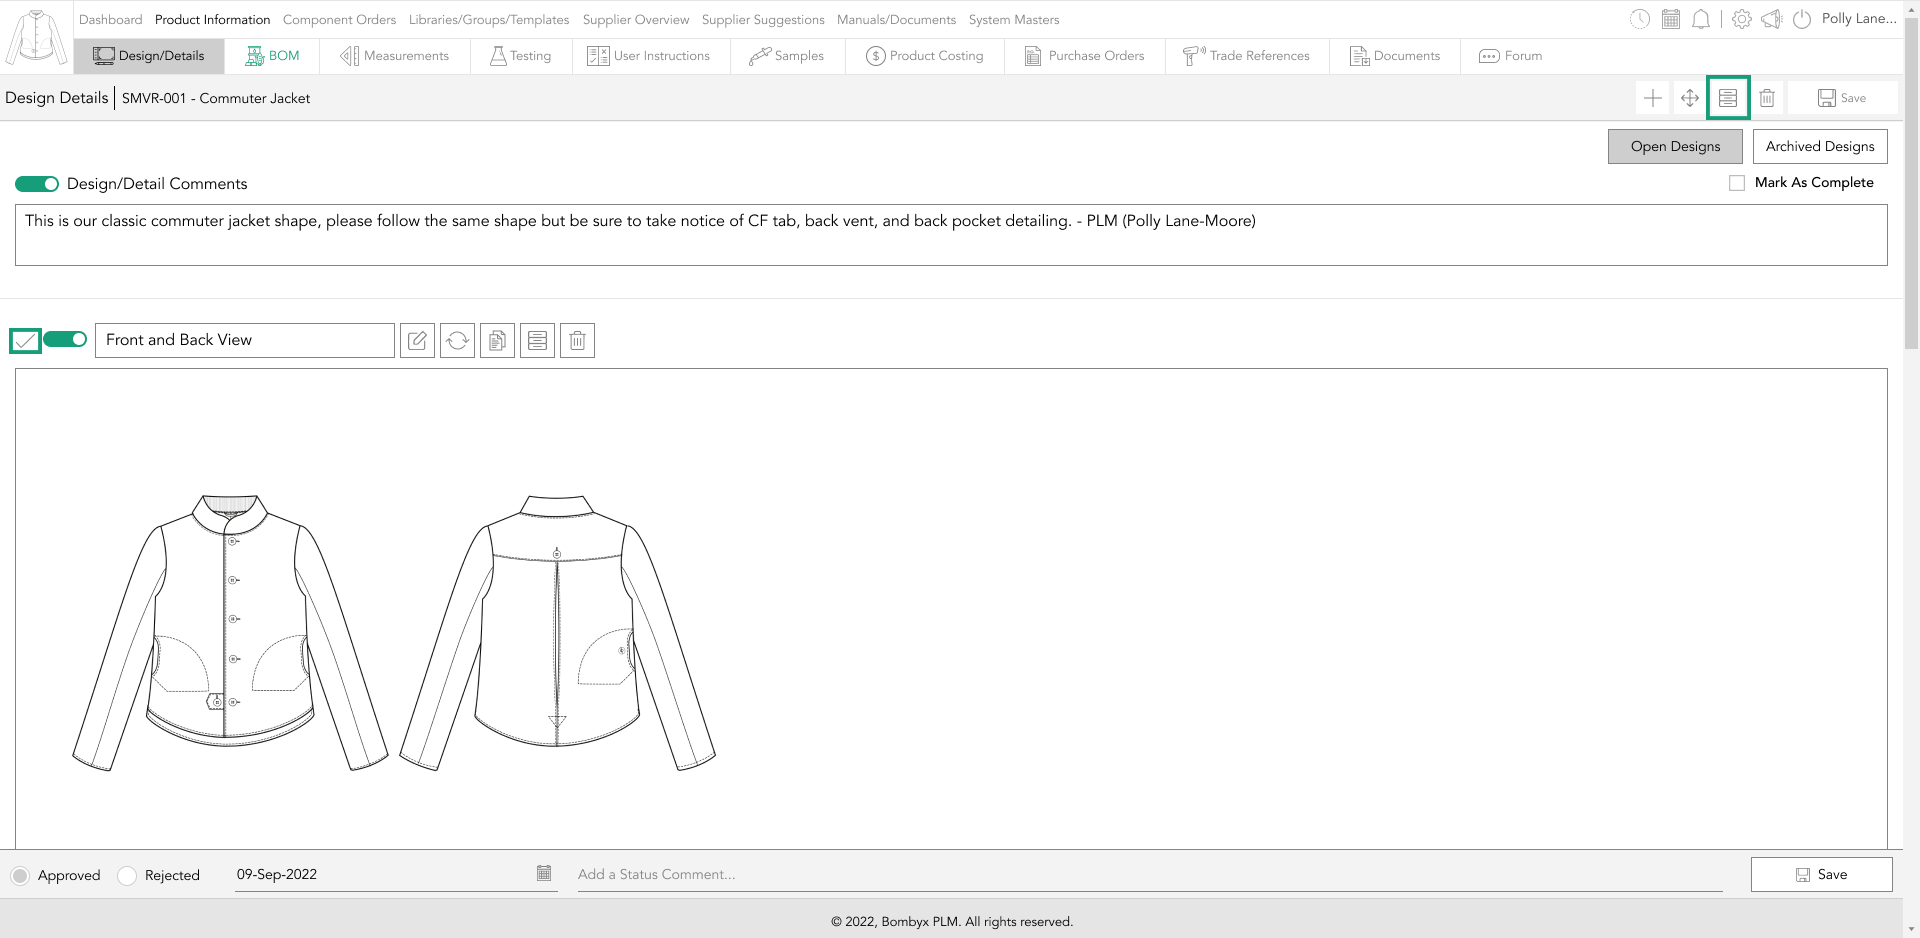
The same popup will appear asking if you’re sure you’d like to archive, along with a text area field to give a comment/reason for archiving.
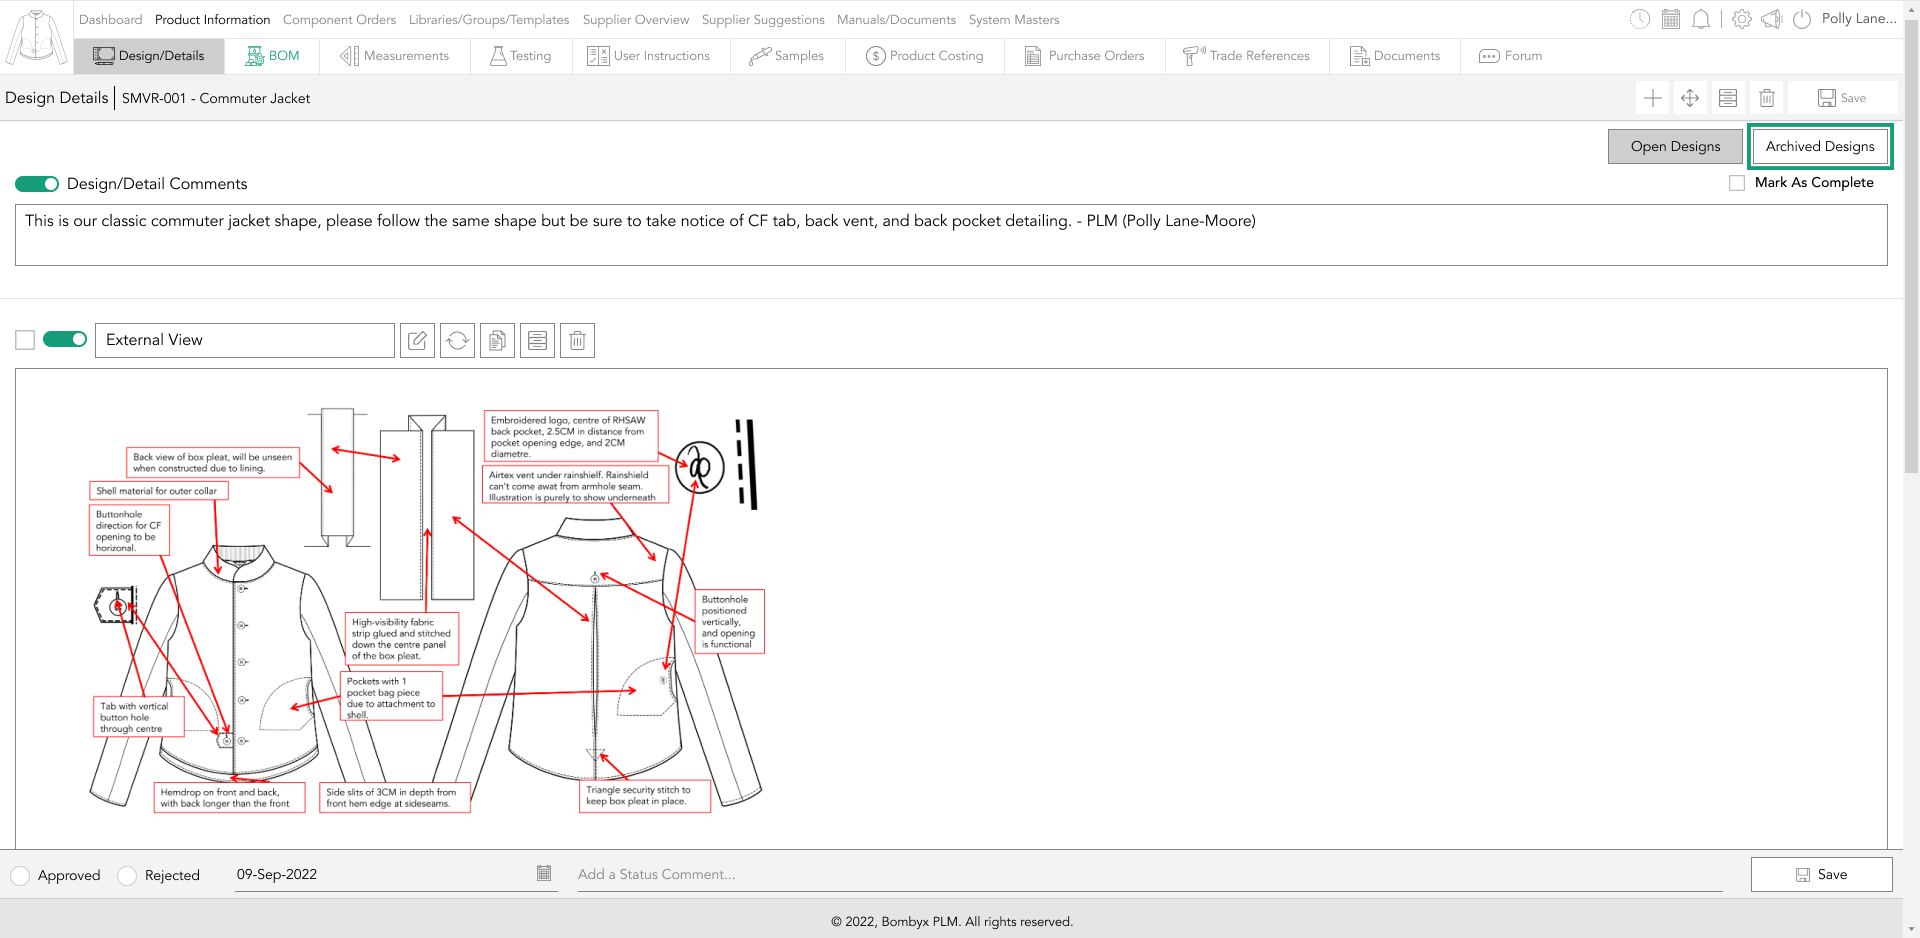
Once archived, this design/detail will no longer show in the open designs tab, but will be available to view in the archived designs tab.
If you want to unarchive designs that you have previously archived, follow the same archiving instructions but in the archived designs tab.
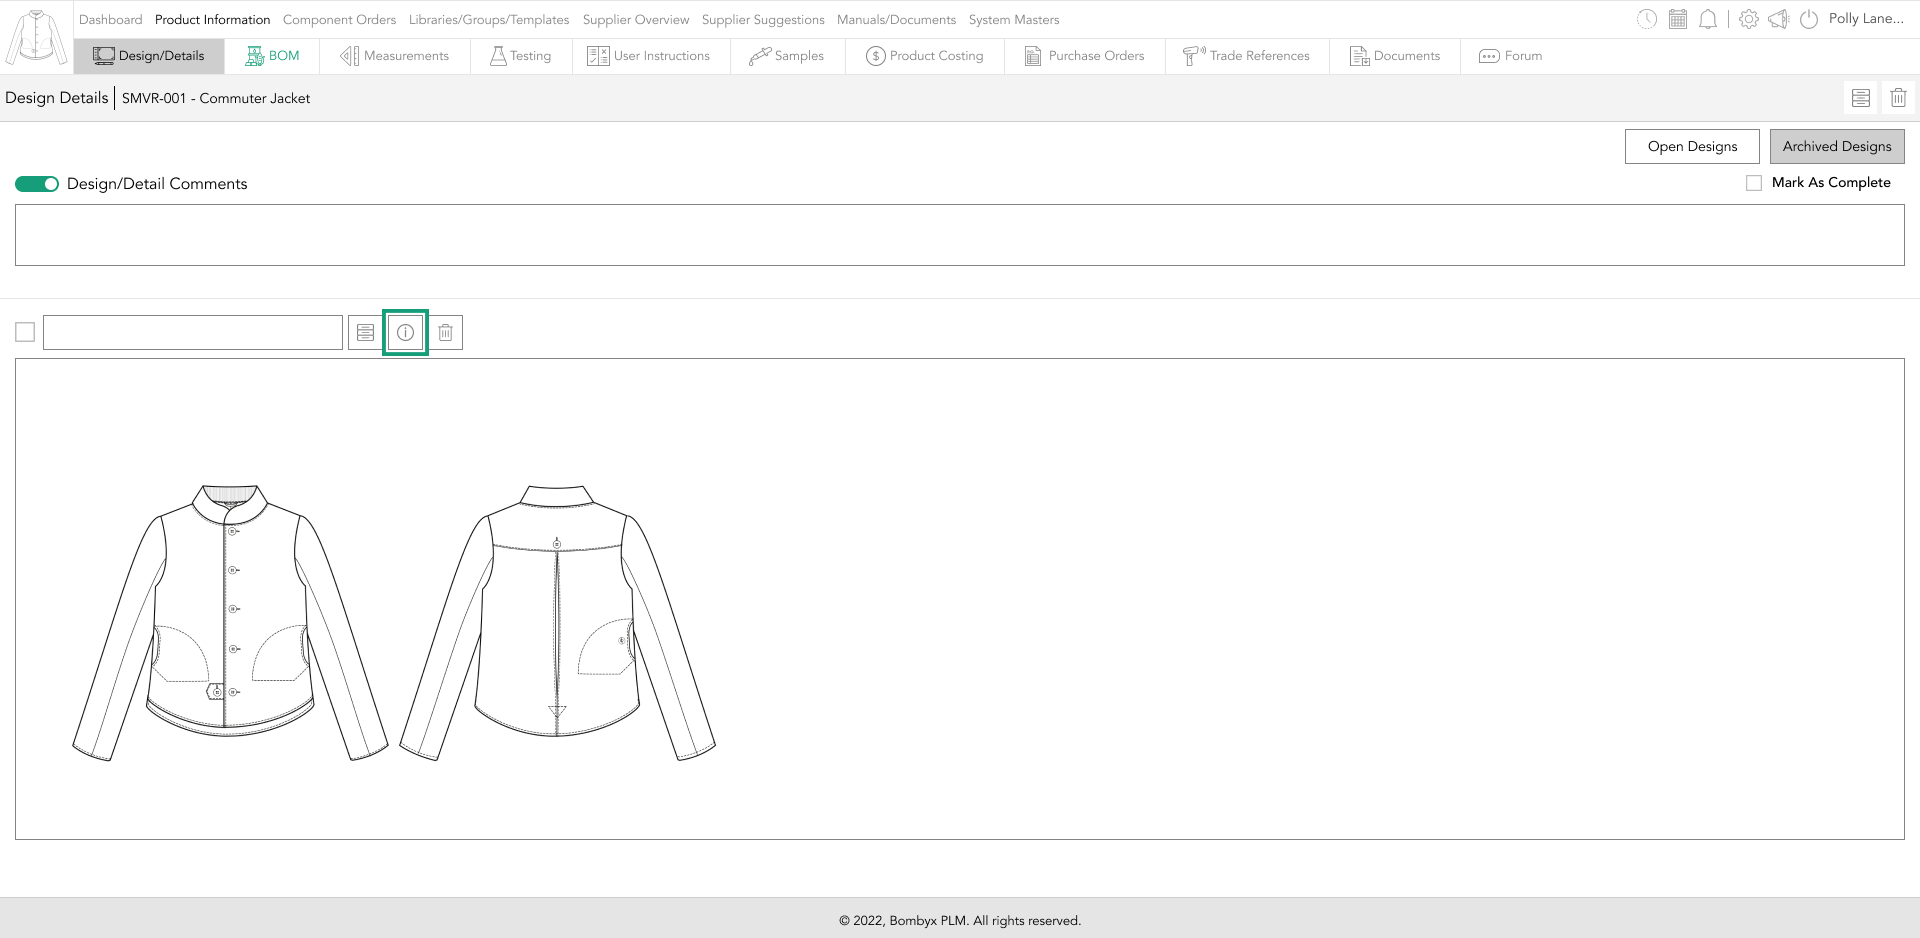
Additionally, to view information regarding an archived design, hover over the information icon of the design in the archived designs tab to reveal information on who originally archived this design, and at what date and time, with the given reason for archiving it.
deleting single and multiple designs
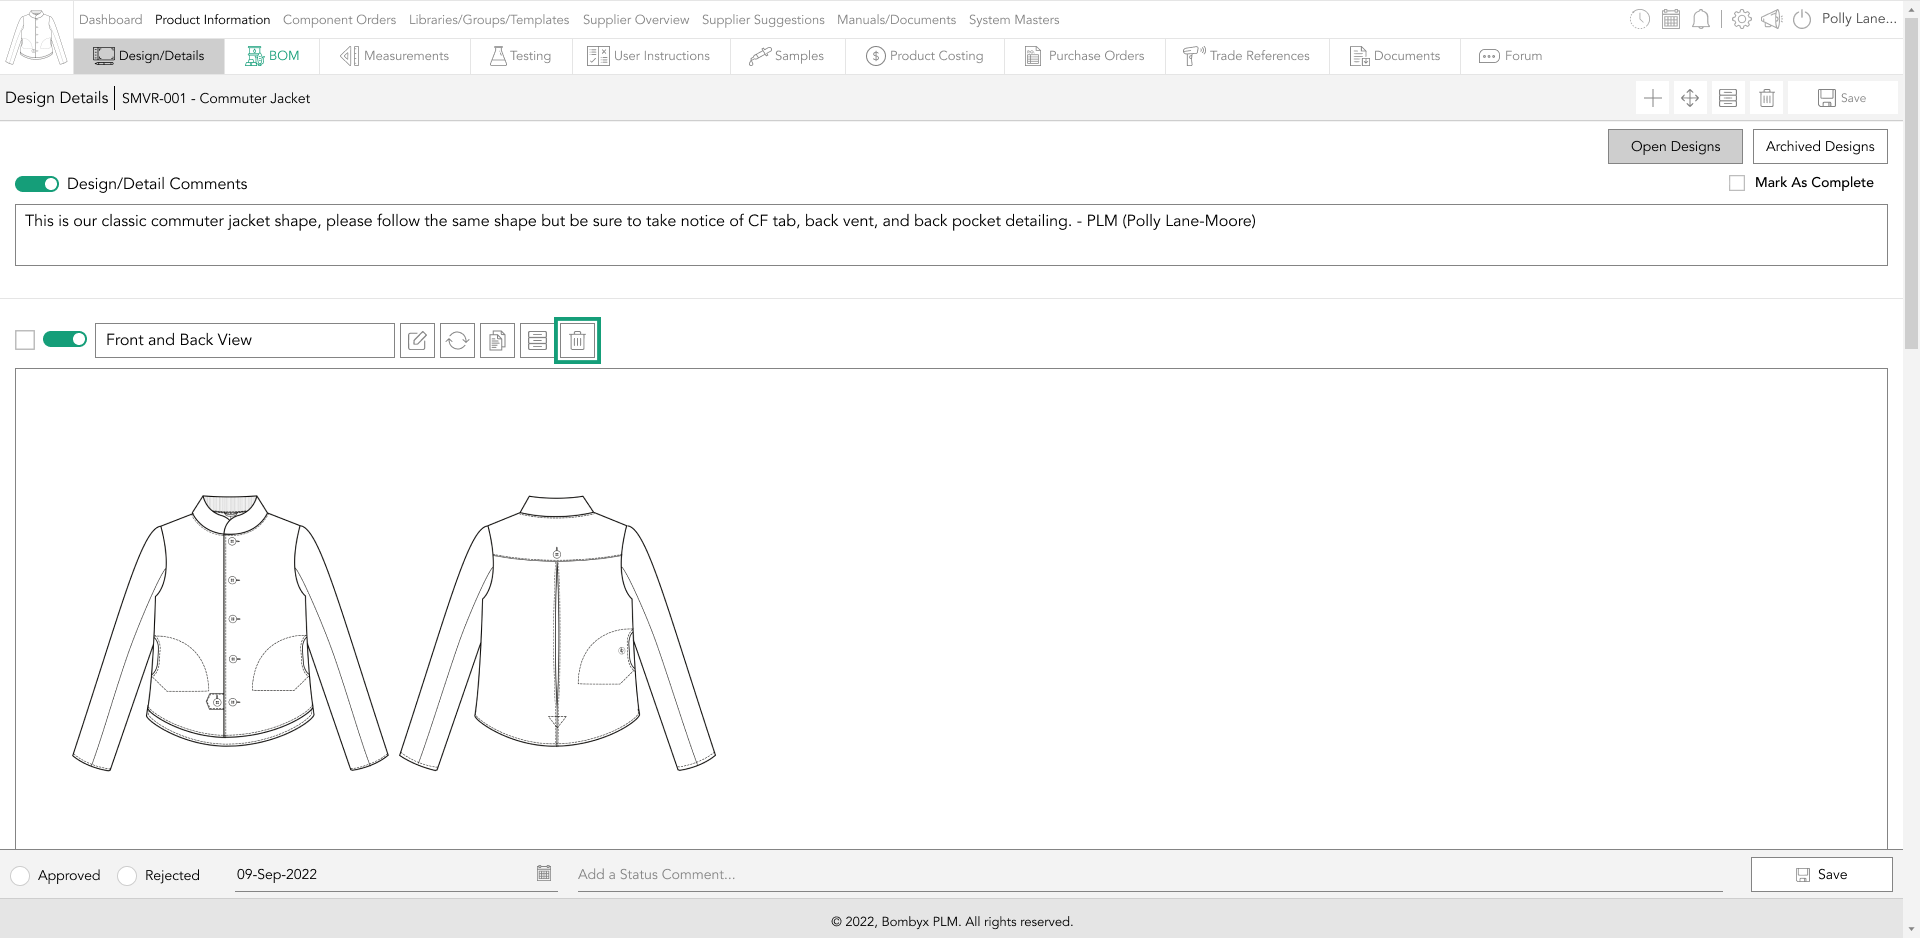
To delete a single design, tap the delete icon on the right-hand side of the title field for the design you’d like to remove.
A popup will appear asking if you’re sure you’d like to permanently delete the design upload. Tap yes to permanently delete. This action cannot be undone
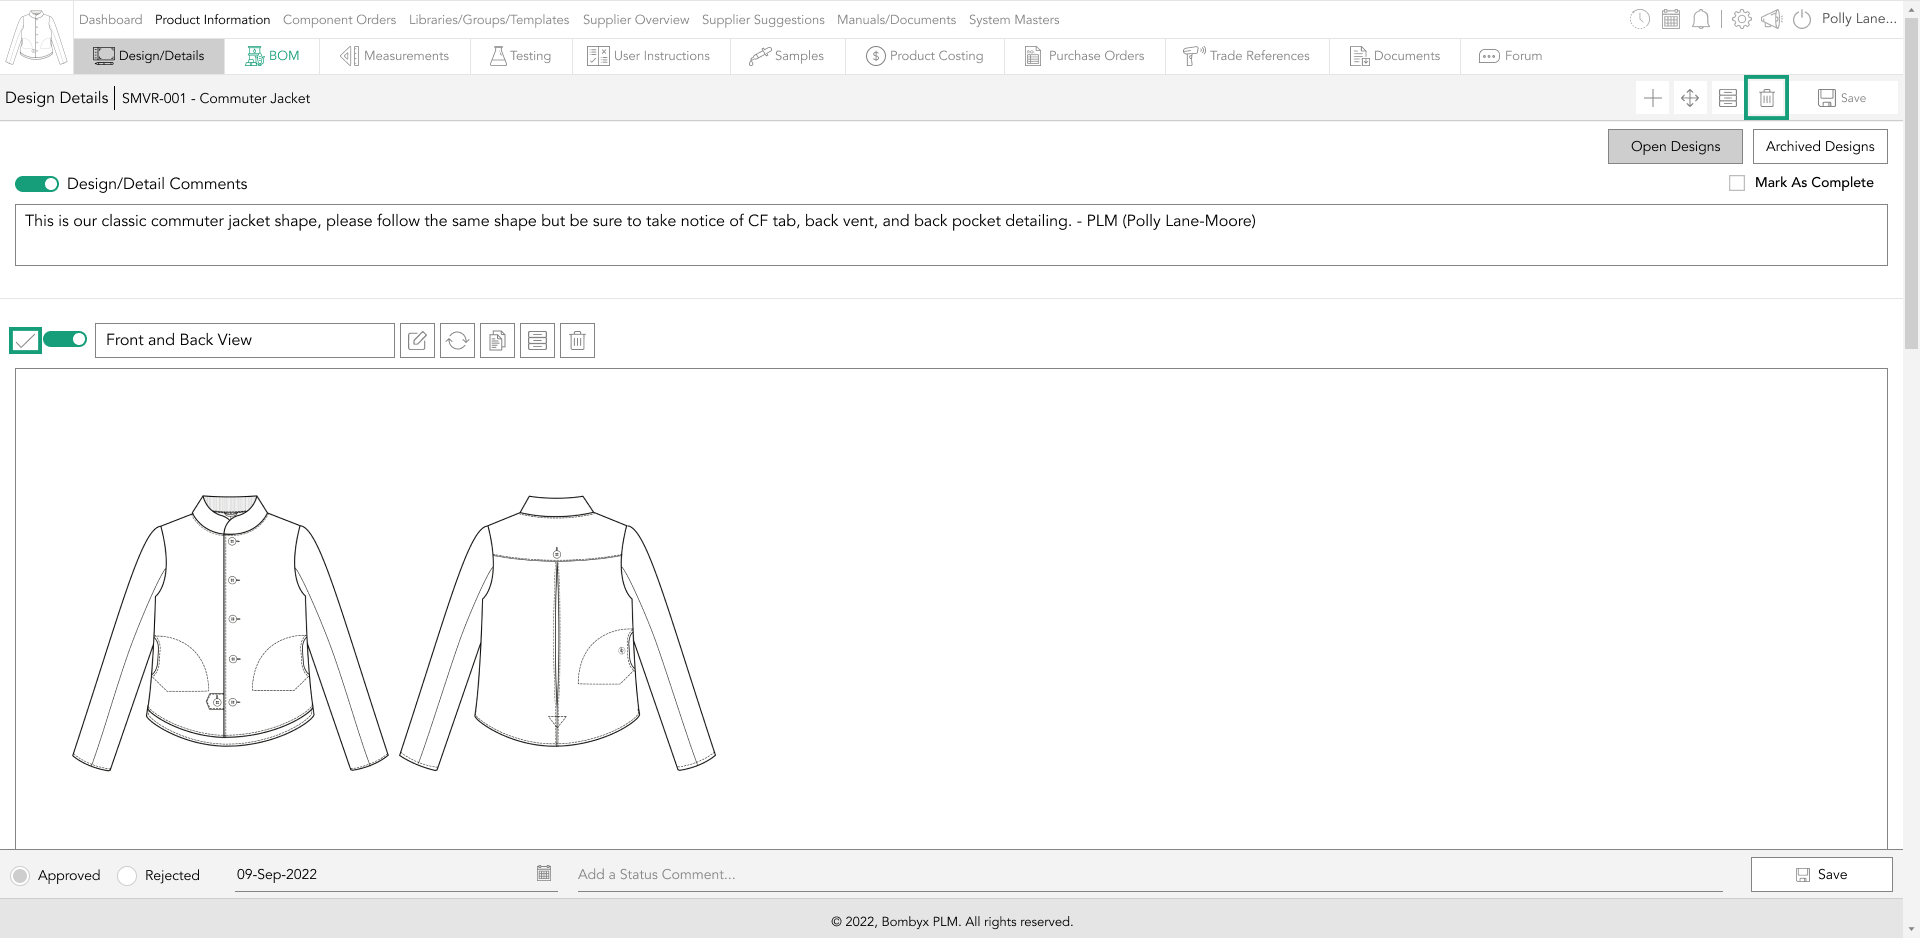
To delete multiple designs, check the checkboxes to the left-hand side of each design's title field.
Once you have selected the design sheets you’d like to delete, tap the delete icon on the right-hand side of the grey bar at the top of the page.
The same popup will appear asking if you’re sure you’d like to permanently delete the selected design uploads. Tap yes to permanently delete. This action cannot be undone.
If you want to permanently delete designs that you have previously archived, follow the same deleting instructions but in the archived designs tab.
approving and rejecting a design
To approve or reject a design upload, select the checkbox to the left of the design title field. This will enable the status bar at the bottom of the page (above the footer), allowing you to approve or reject the upload.
Tip: You can select more than one item to approve/reject at once.

mark it as complete
To mark the whole of design/details as complete for your product, check the checkbox to the left of ‘Mark as Complete’ on the top right of the page.
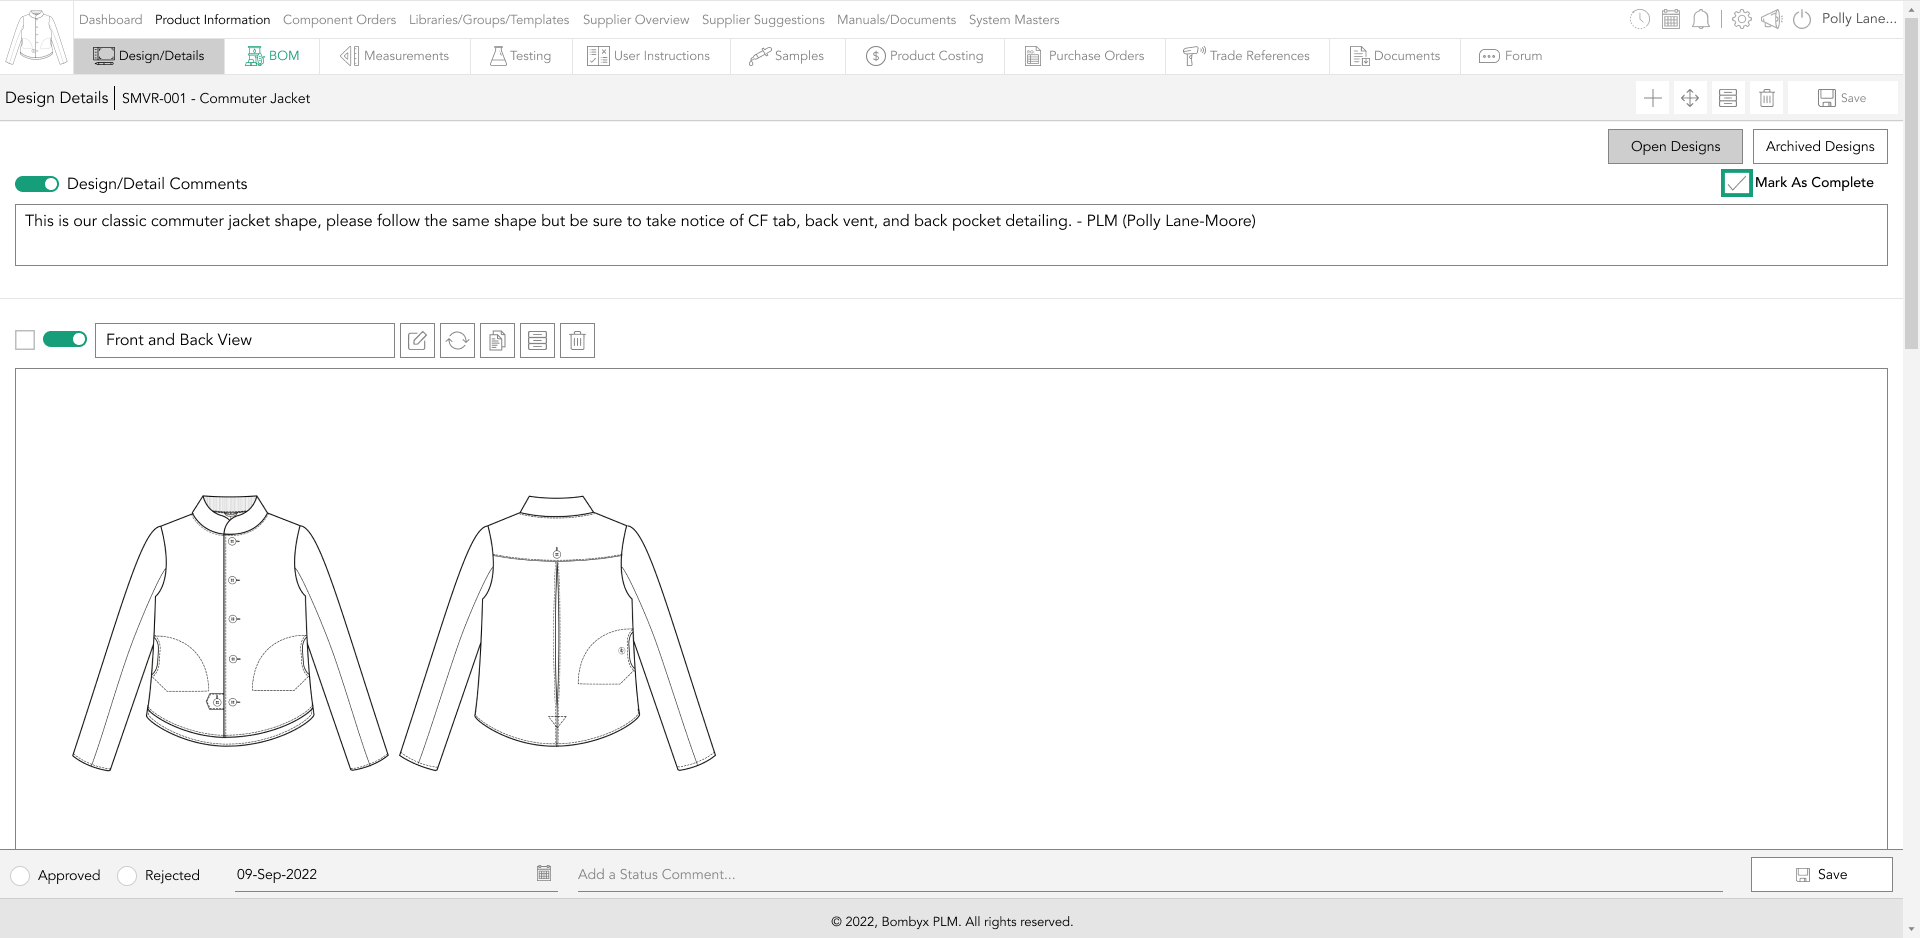
Doing this updates your product's progress report to give you and your team a clear understanding of where your product is at in its lifecycle, and to know which areas are incomplete and needs further action.

Beyond the Label: Diving into the Sustainable Story with Digital Product Passports
Consumers today are increasingly concerned about the environmental and social impact of their purchases. From the food they eat.

Bombyx’s AI Integration: Advancing Business Excellence in PLM, PIM, and DAM Systems
Let's delve into the exciting realm of Artificial Intelligence (AI) undergoing a transformative evolution. As we Enter the year 2024.

Beyond Baubles: A Stylish Dive into Christmas Fashion Trends.
e explore the latest Christmas fashion trends, with a focus on achieving a harmonious balance between sophistication and comfort. From luxurious velvets to cosy knits

Streamlining Winter Fashion with PLM: Managing Seasonal Changes
Winter fashion production demands meticulous planning and execution. PLM serves as a guiding force in production management, aiding in resource allocation, scheduling

Christmas Experience through Digital Transformation
During the Autumn/Winter months in Europe and the USA, are marked by heightened activity. The festive season introduces an atmosphere of joy and unity. Amidst the era of digital in

Demanding Trends & The Transformative Power of Product Lifecycle Management
Explore how strategic Product Lifecycle Management (PLM) empowers fashion to navigate trends sustainably. This post delves into the symbiosis of trends and sustainability,

The Power of Product Information Management (PIM) With a PLM System.
In today's fast-paced business environment, effective product information management is crucial for success. Product Information Management (PIM) is a powerful tool.

Fashion and the Power of Product Lifecycle Management
In recent years, the fashion industry has witnessed a surge in fashion, a phenomenon characterised by the rapid production and consumption of inexpensive clothing... and a whole l

Supply Chain Management has Forever Changed
Brands make use of product lifecycle data analysis to help them work out price points, marketing and advertising strategies, packaging, growth and expansion… and a whole lot more